Everyone has faced that split-second moment when a missing button or a sudden tear threatens to send a favorite shirt to the trash. Instead of panicking, spot quick repairs as your handy escape route to extend clothing life.
Small fixes don’t just help you save money—they transform forgotten garments into reliable daily wear. For people focused on micro lifestyle skills, these quick repairs reconnect us with resourcefulness and reduce throwaway habits.
Curious how easy techniques and simple household tools can revive tired jeans or fraying seams? Let’s explore practical, real-world methods to keep more clothes in rotation instead of in the garbage.
Tackling Lost Buttons with Purpose: Reattachment for Daily Reliability
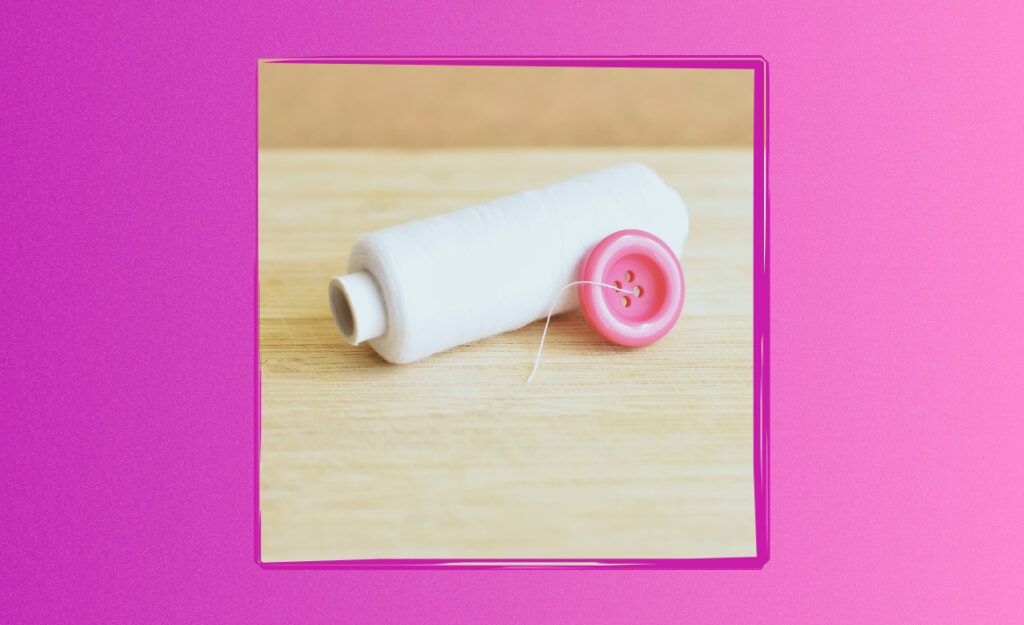
Restoring a lost button turns clutter into usability. Learning this quick repair puts neglected shirts back on hangers, not in landfill. Gathering a needle, thread, and replacement button, you’re halfway to a functional, wearable garment.
Thread matching is the first step. If you match the thread color to your fabric, the repair looks invisible. Secure the button firmly so it resists tugs and regular use. Consistency makes each fix easier next time.
Assess the Spot Before Sewing
Look at the fabric around the missing button. A frayed patch needs reinforcement—a double-threaded stitch gives needed support. Smooth out wrinkles and lay the shirt flat for best results every time.
Anchoring your first knot underneath the fabric keeps things tidy. Pass the needle through the original buttonholes several times, snug but not too tight. This approach preserves fabric and prevents puckering.
Avoid knots on the visible side. Finish off beneath the button, tying a double knot close to the fabric so the repair holds. Give the button a gentle wiggle to test your work before moving to the next garment.
Organize a DIY Button Kit
Keeps a small resealable bag with spare buttons, a needle, and two neutral threads—black and white. Tuck it in a drawer or purse, turning every loose button into a quick repair opportunity, even while traveling or at work.
Label buttons if you save them after buying a new shirt or coat. Sorting by size and color saves frustration. An organized kit makes spontaneous mending more efficient and prevents lost time searching for supplies.
Add a tiny pair of scissors or nail clippers to the kit for trimming thread ends. Involving older kids helps build their micro lifestyle skills, showing repairs aren’t just chores but creative, practical acts of care.
| Button Type | Fabric Suitability | Fixing Tool | Takeaway |
|---|---|---|---|
| Flat | Shirts, blouses | Standard needle | Best for everyday tops |
| Shank | Jackets, coats | Sturdy needle | Supports heavy fabrics |
| Snap | Children’s wear | Snap pliers | Quicker for active wear |
| Decorative | Cardigans | Sharp needle | Adds flair, not just function |
| Metal | Denim, outerwear | Upholstery needle | Handles high wear spots |
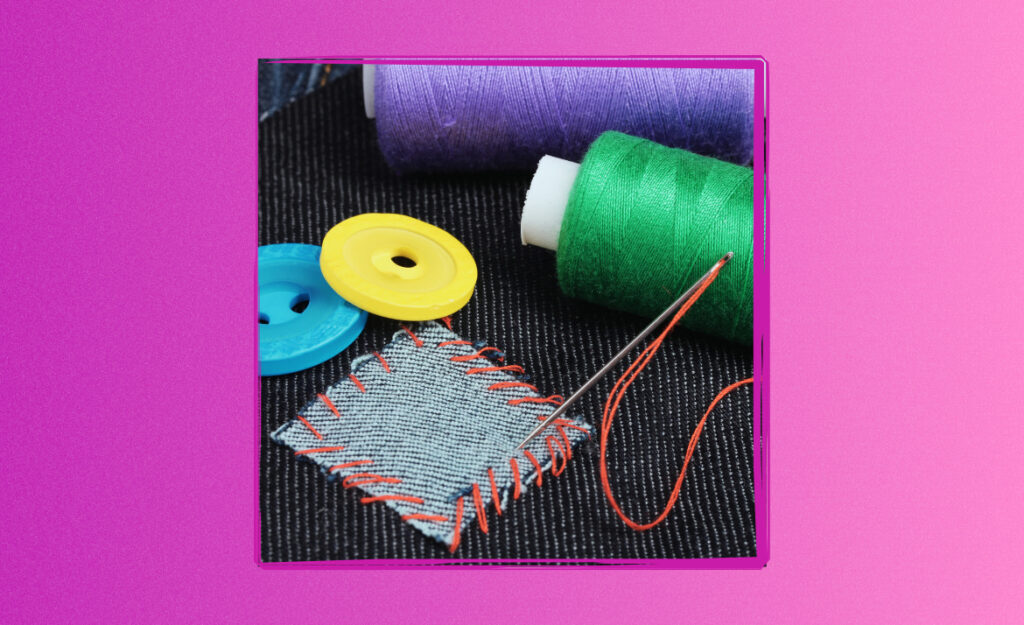
Small Seam Tears: Invisible Fixes for Everyday Clothes
This section pinpoints how to close minor seam splits using basic hand stitching—a simple, quick repair that restores strength and appearance. Always start with clean, dry fabric to help stitches grip.
A straight, even overcast or whip stitch hides well inside most seams. Cut loose threads before you begin, and always sew with the garment turned inside out. This ensures a neater finish.
Prevent Seam Fraying Before Stitching
Seal the edges with clear nail polish or fray check before you sew. This stops the tear from growing and makes your quick repair longer-lasting without adding bulk.
- Pin edges together, matching fabric. Keeps the repair even from start to finish for both sides to align correctly, making later stitches blend in smoothly.
- Start stitching half an inch before the actual tear. Prevent new gaps by reinforcing surrounding fabric, making it less prone to repeat breaks after a few wears.
- Tug thread gently after every few stitches. Avoid puckering by keeping the tension even, so the seam settlement looks natural and remains flexible when worn.
- Tie a double knot at the end. Locks threads in place, keeping the fix steady through daily movement, washes, and stretching from regular use.
- Trim excess thread close. A tidy finish prevents future fraying and makes repairs invisible, helping garments last through more wash and wear cycles.
Always check the repair in bright light, gently stretching the seam to see if any hidden holes remain. Every pass helps you spot weak points before they turn into larger issues.
Reinforcing High-Stress Seams
Areas like underarms or inseams handle more strain and benefit from reinforcing. After the initial repair, double back over trouble spots with extra stitches—an easy upgrade to your quick repairs toolkit.
- Mark high-stress zones with chalk. Visual reminders guide your focus as you repair high-movement areas like elbows or knees, preventing sudden blowouts in future wears.
- Use double thread for durability. While standard repairs use one thread, doubling increases resilience against daily actions such as bending or stretching in fitted garments.
- Sew in short, tight backstitches. Compact stitches anchor the fabric together, reducing chances of the seam separating again when the area’s under pressure—a must for workwear.
- Finish with a locking stitch. This final stitch secures everything, ensuring the repair outlasts your heaviest use, like running or carrying backpacks.
- Inspect at every laundry cycle. Take a quick look after washing to address new strain quickly, keeping the garment rotation-ready for another week.
These micro skills create lasting habits that build confidence. The more you practice these quick repairs, the less likely you’ll need to replace your favorite items for minor faults.
No-Sew Fixes: Solving Clothing Glitches in Minutes
Fast solutions help when there’s no time to find a needle and thread. Many quick repairs are possible using household items like safety pins, fashion tape, or even glue for temporary holds.
Perfect for quick appearances or emergencies, these methods let clothing stay wearable until you can do a more permanent fix. They’re best for hems, loose straps, or small openings.
Fashion Tape Secrets for Emergency Repairs
A strip of fashion tape saves a gaping buttonhole or hem that’s come undone in seconds. Stick it between overlapping edges, press firmly, and smooth out any wrinkles for a seamless finish.
Tuck a small roll in your wallet or work desk. Use tape when time prevents sewing—like before heading into a meeting or event. Avoid wet environments, as moisture weakens the hold.
Replace the tape after each wash. It’s not a long-term solution, but for on-the-go situations, these quick repairs preserve the look of business shirts, skirts, and jackets until home sewing is possible.
Safety Pin Tricks for Last-Minute Fixes
Fasten a shirt placket, secure a bra strap, or close a seam gap with a discreet safety pin. Slide the pin through both fabric layers, hiding the head inside folds or seams for a cleaner look.
For larger tears in casual wear, use two pins criss-crossed. This distributes tension and reduces the chance of further rips during movement. Inspect after each use—switch out dull or bent pins promptly.
These quick repairs let you finish the day confidently. Always remove pins before laundering to prevent snags or rust marks later, turning these emergency fixes into habit-forming maintenance skills.
Reviving Zippers: Step-by-Step Guidance to Unstick and Realign
A misaligned or stuck zipper can seem impossible to repair, but quick repairs bring back smooth slides with simple techniques. Always inspect the entire zipper track first for fabric, lint, or snags.
If the zipper teeth are clogged with dirt, gently scrub them with an old toothbrush. For stuck sliders, a touch of pencil graphite or a dab of soap lubricates the mechanism without introducing excess mess.
Aligning Misplaced Zipper Teeth
Start by closing the zipper entirely. If a tooth is bent, straighten it using a pair of tweezers, being careful not to pull too hard. Slide the zipper gently to test alignment.
If the slider has jumped off the track, thread both sides of the zipper into the base and pull the slider through slowly. Light pressure and patience keep the fabric from catching.
Test several times to confirm smooth movement before wearing the garment again. If the zipper still derails, a quick replacement is possible using a zipper repair kit for a more permanent fix.
Upgrading Zipper Routine for Garment Longevity
Gently tug the zipper at the base—not the pull tab—for regular opening and closing. This small adjustment to your routine minimizes future damage and extends the life of your quick repairs.
After fixing, avoid overstuffing bags or pants. Too much pressure can strain the zipper teeth, undoing prior work. Store repaired clothes zipped up to help realign the hardware naturally.
Quick repairs to zipper issues cost pennies compared to constant replacement. Building this awareness into your daily habits can significantly decrease wardrobe waste, saving money over many seasons.
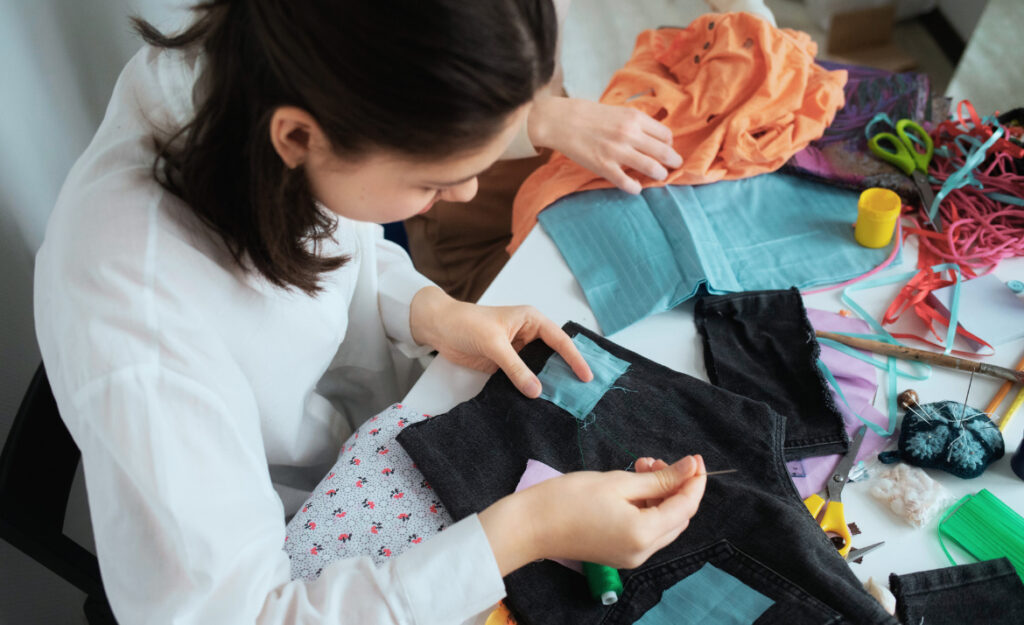
Patching Holes: Making Garments Last with Simple Techniques
Quick repairs for holes are about blending strength with subtlety. Choose an iron-on or sew-on patch that matches or compliments the garment’s fabric—a micro-skill that keeps beloved pieces in your everyday lineup.
For iron-on patches, lay the garment flat, preheat the fabric with an iron, then press and hold the patch until it bonds. For hand-sewn solutions, a neat running stitch around the patch edge does the trick.
Stabilizing the Area Around the Hole
Trim any fraying around the hole before starting. This prevents further spreading and makes your patch lay flatter. Ironing the area first helps the adhesive grip if you’re using an iron-on product.
After applying the patch, let the garment cool completely before wearing or washing. A cold surface means adhesives have set, forming a strong seal for active use and laundry cycles.
For high-mobility areas like knees or elbows, reinforce the patch’s edges with a line of tight backstitching. The combined adhesive-and-thread approach delivers the most robust quick repair for heavy use.
Creative Patchwork to Add Character
Patchwork isn’t just about practical fixes—it also personalizes clothing. If a plain patch feels boring, pick a contrasting color or shaped fabric and turn the fix into a small accent piece.
Try whimsical shapes that reflect a hobby, like a small guitar or leaf. This makes the quick repair a talking point and turns previously flawed clothes into stand-out favorites, blending necessity with style.
Tell friends, “This fox patch hides the family dog’s mark.” Your clothing narrative grows with every mended hole, reinforcing connection to your wardrobe and micro lifestyle skills every day.
Getting Stains Out Fast: Action Steps for Immediate Results
Act quickly to remove stains, and your wardrobe stays looking fresh. The moment a spill happens, blot—don’t rub—the spot gently with a clean cloth. Sprinkle baking soda or salt for liquid absorption before treatment.
Mix a quick repair solution: water with a drop of dish soap or white vinegar handles many stains, from food to mud. Dab gently, working outside in to avoid spreading, and rinse with cool water afterward.
Tackling Specific Stain Types
For red wine, apply club soda as soon as possible. For grease, use a touch of cornstarch or talcum powder before dabbing with dish soap. Protein stains like blood respond well to cold water and gentle scrubbing.
Use a soft-bristled brush when needed. Don’t be aggressive—small circles with light pressure lift pigment without damaging fabric fibers, making these quick repairs safe for both sturdy denim and delicate silks.
If stains remain, repeat the blotting and rinsing cycle. Quick repairs for stains are about persistence, not brute force. Every attempt improves chances of full removal and prolongs garment life without replacements.
Saving Shoes and Accessories: Beyond the Basics of Clothing Fixes
A well-rounded approach to wardrobe maintenance covers shoes and belts too. Learn quick repairs like using glue for reattaching soles and leather conditioner for scuffs. These tools cut back on replacement costs and waste.
Tighten loose screws in glasses or jewelry with a mini screwdriver. Keep one in a drawer alongside super glue, which mends minor breaks on handbags or sandals, keeping micro lifestyle skills sharp and practical.
Everyday Shoe Care Techniques
Polish scuffed leather shoes with a dab of petroleum jelly or cream. For canvas sneakers, a quick spot clean with water and mild soap keeps them looking new between wears, reducing the need for deep cleaning.
Firmly press shoe glue into separated soles and clamp for a few hours to set. For worn laces, restring with sturdy replacements, using a safety pin to feed new laces easily through small eyelets on all types of shoes.
Shoe repair isn’t a mystery—like patching holes, these small acts keep favorites alive and support an efficient, eco-friendly wardrobe, with every quick repair setting you up for less waste and lasting satisfaction.
Frequently Asked Questions
What’s the fastest way to fix a split seam without a sewing machine?
Turn the garment inside out, pin the seam flat, and hand stitch using a whip or backstitch. Use double thread for strength, and tie a tight knot to finish your quick repair.
Are iron-on patches permanent or should I sew around them too?
Iron-on patches offer a quick repair that holds for most fabrics, but sewing around the edge adds durability, especially for high-wear areas like knees and elbows. For long-term fixes, combine both methods.
Can I use household items like glue or tape on clothing safely?
Small amounts of fabric glue or double-sided tape make effective, temporary quick repairs. Always test on an inconspicuous part of the fabric first, and plan for a more secure repair when possible.
Is fixing zippers worth the effort, or should I just replace them?
Try cleaning and lubricating the zipper and realigning the teeth as a quick repair—most issues resolve easily. If the slider or teeth are broken, a low-cost zipper repair kit can extend garment life without full replacement.
How do I train myself to make these repairs regularly?
Keep a visible mending kit in a high-traffic space, like your laundry room. Practice quick repairs as soon as an issue appears, developing the micro lifestyle skills that make maintenance a habit instead of a chore.