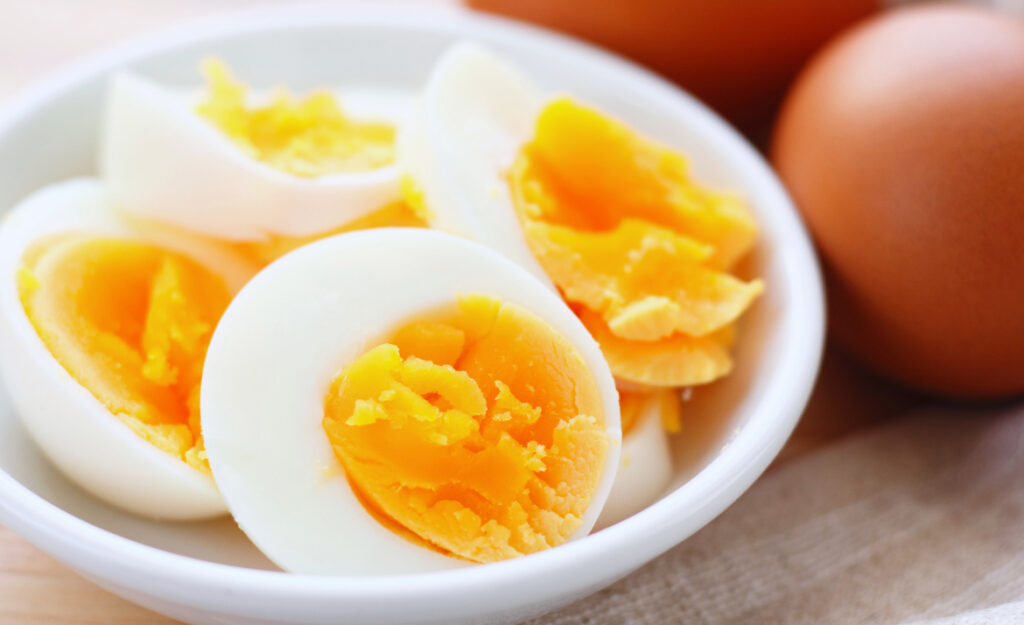
For many, preparing the perfect hard or soft-boiled egg is surprisingly tricky; just when you think you’ve got it down, an unpredictable result foils your breakfast. Whether you want to boil eggs for salads, snacking, or meal prep, inconsistent outcomes can be frustrating.
Understanding a few foolproof methods isn’t just about saving your eggs from over- or under-cooking—it’s about getting consistent, delicious results every single time. Achieving reliability takes away the anxiety connected to wondering if you’ve managed the right texture.
If you’re ready to say goodbye to guesswork, read on. The following sections provide user-tested steps, expert rules, scenario-based guidance, and practical checklists you can use today to boil eggs with complete confidence.
Perfect Grilled Cheese: Achieve the Crispiest Finish Every Time
Explore expert techniques, top bread and cheese picks, and secret flavor boosters for sandwiches that wow every time. Easy, proven results inside.Choose Your Cooking Method With Purpose
Selecting a cooking technique that fits your kitchen routine gets you closer to perfect results. Start by evaluating your available tools and favorite egg textures; your choices should match both equipment and outcome.
Some methods prioritize speed, while others offer control and predictability. The right pick streamlines your routine and guarantees you never have to second-guess your results when you boil eggs again.
Stovetop Boiling: Classic Steps and Adjustments
The stovetop boiling method remains a staple for many. Place eggs in a single layer in a saucepan and cover with an inch of water above the egg tops. Bring to a rolling boil over medium-high heat, then immediately cover and remove from heat.
For hard-boiled eggs, let them sit in hot water for 10–12 minutes, then transfer to an ice bath. For soft-boiled eggs, 6–7 minutes sitting time after boiling yields a tender center. Consider that altitude or larger eggs may need minor time tweaks.
If you’re distracted, set a timer and work on another task; when the timer rings, use a slotted spoon to move the eggs to cold water. This habit ensures you never unintentionally overcook or overboil again.
Steaming: Precision and Speed Combined
Steaming eggs delivers reliable results and simple peeling. Place a steam basket over simmering water. Add eggs and cover the pot tightly. Set a timer: 6–7 minutes for soft, 11–13 for hard boiled.
Steaming’s gentle heat avoids boiling cracks. Try this when you’re multitasking—its shorter cook time and fast post-steam peel make it ideal for busy mornings.
Transfer steamed eggs directly into an ice bath to halt cooking. The shells practically slip away, especially if your eggs have been stored for a week or more before steaming.
| Method | Cook Time (Hard) | Peeling Ease | Ideal For… |
|---|---|---|---|
| Stovetop Boiling | 10–12 min | Medium | Batch cooking with little oversight |
| Steaming | 11–13 min | Easy | Quick meals, easy peeling |
| Pressure Cooker | 5 min (high) | Very Easy | Large batches, hands-off |
| Instant Pot | 5 min (manual) | Very Easy | Reliable timing, low supervision |
| Oven Baking | 25–30 min | Medium | No stovetop needed |
Timing Rules to Pull Off Every Texture
Identifying the right timing delivers the yolk and white exactly as you’d like. The following tips give you an instant sense of control—set your timer with confidence for your preferred doneness.
Always start timing once your water comes to a full boil, or, for steam and pressure methods, once pressure or steam is constant. These details eliminate under- or overdone surprises when you boil eggs.
Crack the Code: Doneness Guide
Consistency comes from precise timing. For jammy eggs, 7 minutes results in just-set whites and creamy yolks. Hard-boiled eggs reach full set by 10–12 minutes.
If you prefer slightly runny centers, set your timer for 6. For salads, sandwiches, and deviled eggs, aim for at least 11 minutes so eggs are sturdy for slicing.
Use the following sequence: “Timer on at boil, eggs out, ice bath 5 mins”. Print this to stick to your fridge. No more guessing if your eggs will peel well.
- Start timer at the actual boil, not when adding water. This ensures you account for the correct cook start every time you boil eggs.
- For a jammier yolk, always remove eggs at 6–7 minutes and use a cold water shock—this halts carryover cooking and keeps yolks glossy instead of dry.
- Hard yolks need a minimum of 10 minutes but tend toward chalky if they go beyond 13, even a minute counts.
- For batch prepping, stagger your timing by batch and label Tupperware by date and doneness (e.g. “Wed: 7-min eggs, jammy”).
- Use an ice bath of at least four minutes—too brief a chill keeps residual heat cooking the eggs, which risks chalky or dark-gray yolks.
Adopting these rules transforms egg boiling into routine success, taking uncertainty out for good.
Small Adjustments for Large Eggs
If your supermarket carries XL or jumbo eggs, scale up your boiling or steaming times by a minute. Small eggs need less than standard guidelines for a comparable texture.
- Large eggs: 11 minutes for hard, 7 for jammy. Adjust by texture check after your first try, and note results for future batches.
- Extra-large eggs need about one minute more than large eggs. XL, for example, = about 12 minutes hard-boiled, 8 minutes jammy.
- Always use the same timer device—consistency of tool eliminates accidental under- or overboil, especially if your phone timer lags or interrupts.
- Write a brief note or timer rule onto your fridge. For instance, “XL = +1 min. Small = –1 min.”
- Track your textures by yolk color: pale yellow indicates overboil, vividly yellow means ideal timing and proper chilling.
These micro-adjustments, when followed, fit every egg type you’ll encounter in the market or on the farm.
Prepping Eggs for Flawless Results Every Time
Working with eggs straight from the fridge versus ones rested at room temperature changes the boil eggs texture. For example, cold eggs plunged into hot water crack more easily.
Rest eggs on the counter for 10–15 minutes and you’ll see smoother shells, fewer cracks, and easier peeling when your boiled eggs cool.
Using Fresh vs. Store-Bought Eggs in Practice
With farm-fresh eggs, expect tighter whites and tougher shells at first. Store-bought eggs usually peel easier after boiling, especially after a week of refrigeration.
If someone asks, “Why aren’t these peeling smoothly?” explain that fresh eggs create a tighter, stickier shell membrane—for easier shells, use eggs at least five days old.
Gently tap eggs on the counter before boiling. This micro-crack lets water between membrane and shell, boosting easy-peel chances.
Condensed Prep Checklist for Consistent Results
The following steps prevent unexpected cracks and rubbery whites. Use this list when you boil eggs to cut surprises. Conversation at brunch: “I always follow these exact five steps for easy party prep.”
- Rest eggs at room temperature for 10–15 minutes to avoid shocking the shell with rapid temperature changes.
- Add eggs to gently boiling, not violent, water—harder boils bounce eggs and increase cracking risk.
- Use a spoon to lower eggs into water. This tip matters most with taller pots and heavier batches.
- Salt or vinegar in the water seals tiny cracks and helps shells pull cleanly. One teaspoon per quart is plenty.
- Promptly transfer eggs to an ice bath after boiling. This stops cooking and preps for easy peeling when cooled.
Stick to these prepping basics and each batch will match the previous, every time you boil eggs for guests or meal prep.
Cooling and Peeling: Best Techniques and Simple Fixes
Finishing eggs properly can make or break your dish. Immediate chilling locks in the desired texture and improves the peeling experience.
Don’t skip this step—move eggs to an ice bath as soon as cooking finishes to prevent overcooking and discoloration at the yolk edge.
The Shock Cooling Step Explained
After boiling, quickly ladle eggs into ice water. This abrupt chill halts cooking within seconds and makes for shells that refuse to stick to the whites.
In a realistic scenario: a friend at brunch says, “My yolks always have a green ring.” Tell them, “Ice bath for five minutes solves that entirely. No green, no chalkiness.”
The benefit goes beyond looks—cold eggs hold their shape during peeling and are ready for salads, sandwiches, or snacks at a moment’s notice.
Foolproof Shell Removal – Practical Tips
Roll cooled eggs gently against the countertop to break up the shell evenly. This micro-shattering lets you peel under a running tap with minimal sticking.
If you spot a membrane tear, slip a teaspoon under the shell and rotate—this tool does wonders for stubborn or slightly sticky eggs. The motion should feel like unzipping a jacket, not scraping cheese from a pan.
Dunking the egg in water as you peel lessens friction and keeps every piece of shell from sticking to fingers or cooked whites. If a chunk is still stuck, give the egg a gentle squeeze and wiggle.
Batch Cooking and Storage: Maximizing Convenience and Freshness
Planning ahead transforms rushed mornings. Batch boiling eggs gives you protein-packed snacks or meal starters for days, making healthy eating easier.
Store eggs in their shells for up to a week in the refrigerator. Label containers with boiling times to grab your desired yolk doneness—this removes guesswork when prepping a quick breakfast or salad.
Storing Boiled Eggs Effectively
Leave eggs unpeeled until just before eating to extend freshness. Peeled eggs dry out faster and take on fridge odors, while unpeeled ones remain moist and neutral.
Stash eggs in a covered container or a sealed zipper bag. Add a paper towel for moisture control. When ready to serve, rinse briefly in warm water to refresh texture.
A label with the batch date and timer mark (e.g., “Thursday – 8 min, jammy”) helps family members pick the right egg on the go. This simple habit also avoids wasted eggs.
Use Prepped Eggs for Universal Meal Prep
Keep a bowl of boiled eggs visible at eye level in the fridge. This increases the odds you’ll snack healthy, and reduces cooking time pressure throughout the week.
Make lunchbox prep simpler by pre-peeling eggs the night before. For best freshness, store peeled eggs wrapped in a damp paper towel inside an airtight container.
Consider offering a quick script for meal builders: “Slice eggs, sprinkle with salt and pepper, dash of hot sauce—snack in two minutes, no stove required.”
Common Pitfalls and Simple Ways to Fix Them
Everyone runs into issues at some point, but each has a reliable fix. The green ring? Overcooking is the cause. Shells sticking? Not enough chill time or using very fresh eggs.
Monitor water temperature from the start and use an ice bath as insurance. These habits cut 90 percent of mistakes right away each time you boil eggs.
Comparing Pitfalls With Quick Remedies
| Problem | Cause | Quick Fix | Do Next Time |
|---|---|---|---|
| Green yolk ring | Excess cooking time | Use ice bath immediately | Shorten cook by 1 min |
| Shells stick badly | Fresh eggs | Peel under water | Use older eggs |
| Rubbery whites | Extreme heat | Monitor boil intensity | Boil gently |
| Cracked eggs | Cold eggs into hot water | Start with room temp eggs | Warm eggs in advance |
| Off flavors | Over-long fridge storage | Eat quickly | Label dates |
Analogies for Technique
Think of boiling eggs like setting a watch—precision pays off. Each minute off is like a watch set wrong: something will definitely be out of sync.
Peeling is like opening a present—if you rush, the paper rips everywhere. Take time, use gentle force, and aim for a clean reveal each time you boil eggs for guests or family.
Cooking more eggs is like baking cookies: the second batch is always easier. Note what didn’t work and do one thing differently for the next try. Small, specific tweaks yield the best results.
Zero-Guesswork Confidence: Repeat With Ease
Now, with step-by-step techniques, micro-adjustments, and fixes for common pitfalls, you gain confidence for every batch. Boil eggs knowing every outcome is repeatable and perfect for meals, snacks, or gatherings.
Every tip and checklist you’ve encountered puts the guesswork behind you. Egg boiling becomes a no-fear activity, from Sunday meal prep to quick weekday breakfasts—use the right timing, cooling, and storage for foolproof results.
Your kitchen can be a place of consistency—delicious, jammy, or sturdy egg textures on demand. Keep your timer, your ice bath, and your new game plan ready. Enjoy eggs made your way, no second-guessing needed.
Frequently Asked Questions
How do I get eggs to peel easily every time?
For easy peeling, let your eggs cool in an ice bath for five minutes immediately after boiling. Older eggs peel smoother than fresh ones. Adding a teaspoon of vinegar or salt to boiling water can help prevent shell sticking, too.
What’s the best way to avoid the green ring around yolks?
The green ring appears when eggs are overcooked or cool too slowly. Stop cooking by chilling eggs immediately in an ice bath. Aim for 10–12 minutes boiling, then cool quickly for perfectly yellow yolks every time.
Can I boil eggs straight from the fridge?
Using eggs directly from the fridge increases chances of cracking. For best results, rest eggs at room temperature for 10–15 minutes before boiling. This simple habit lowers the risk of split shells and uneven cooking.
How long can I store boiled eggs?
Boiled eggs stored in their shells keep fresh for a week in the refrigerator. For peeled eggs, use within three days; seal them in a container with a damp towel. Always label your container with the date for easy tracking and safe snacking.
Is it necessary to use an ice bath?
Yes; an ice bath stops the cooking process immediately, preventing overcooked yolks and rubbery whites. It also shrinks the egg away from the shell, making peeling much simpler. If you skip this, expect stickier shells and less perfect texture.