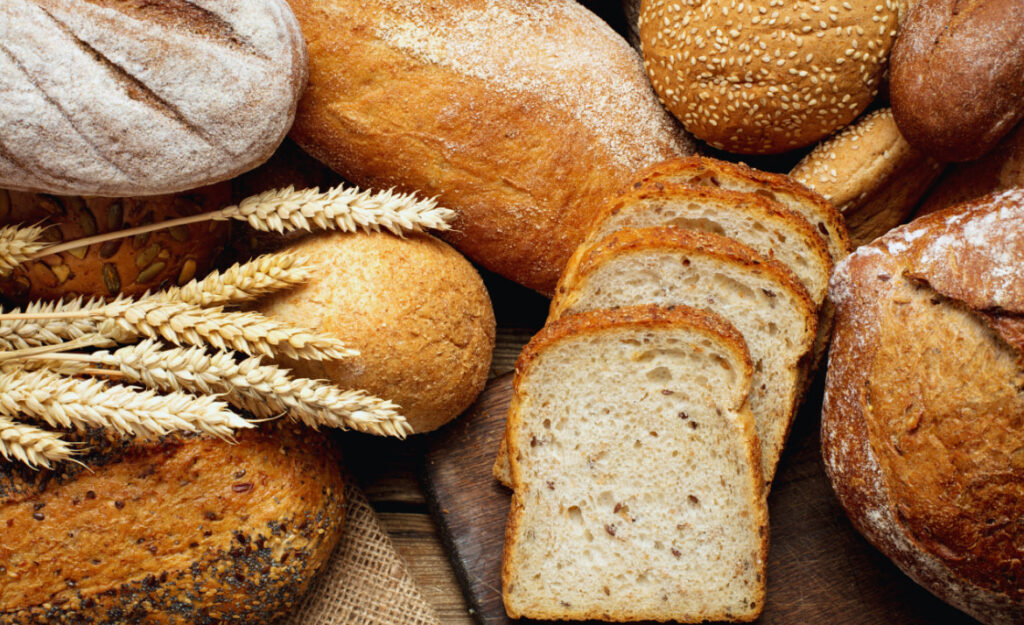
Warm bread cooling on a kitchen counter evokes comfort and accomplishment, a combination many home cooks crave. At first, learning to bake bread might sound intimidating or time-consuming, but it’s much easier than it appears.
Baking fresh bread matters because it grounds you in accessible cooking, using only time, patience, and basic pantry staples. The process connects hands, senses, and home with a satisfying rhythm and result.
Settle in with this guide to learn manageable steps, problem-solving tricks, and the why behind each part of baking. You’ll soon enjoy a loaf worthy of sharing or keeping all to yourself.
Creamy Mashed Potatoes Made the Easy Way
This easy guide covers potato types, mixing secrets, dairy choices, perfect make-ahead tricks, and tasty tricks for using up leftovers.Gather the Simple Tools and Ingredients for Success
Success starts with the right gear and fresh ingredients. Baking bread becomes a repeatable pleasure once you recognize what works and which shortcuts genuinely help.
To bake bread simple at home, a few tools support reliable results. Spoons, bowls, and pans are your allies—no fancy equipment required. Clear steps keep the experience stress-free and rewarding from the first try.
Essential Equipment to Have Ready
A large mixing bowl with sturdy sides lets you combine ingredients efficiently. Wooden spoons or a silicone spatula blend dough while limiting mess. Reliable kitchen scales provide consistency in measuring flours and liquids.
Baking sheets, loaf pans, or even cast iron skillets are useful shapes for home baking. A clean tea towel covers dough as it rises, keeping moisture in while offering flexibility for handling.
Always locate a flat, lightly floured surface—like a countertop or large cutting board—before starting. This space allows for kneading or shaping, minimizing flour drift throughout your kitchen.
Choose Your Ingredients Wisely
All-purpose or bread flour is essential for structure. Yeast (active dry or instant) lifts your dough, while salt deepens flavor. Water serves as the main hydrator and brings everything together for a supple dough.
Warm water—about 110°F—activates yeast more quickly without killing it. Sugar or honey isn’t vital, but a teaspoon wakes up yeast for better rise and a hint of sweetness in the finished loaf.
Butter or oil creates a softer crumb and longer shelf life. Always opt for fresh yeast and check expiration dates before starting. Old yeast won’t rise, making fresh bread impossible.
| Tool | Purpose | Alternative | Takeaway |
|---|---|---|---|
| Mixing Bowl | Combines all ingredients | Large pot | Consistency comes from enough space to mix easily |
| Wooden Spoon | Mixes and folds dough | Silicone spatula | Avoid metal, which can cut yeast strands |
| Baking Pan | Shapes loaf | Cast iron skillet | Pans affect crust type—experiment for your favorite |
| Kitchen Towel | Covers rising dough | Plastic wrap | Soft covering keeps moisture in for fluffy bread |
| Measuring Cups/Scale | Ensures balance of flour/liquid | Eyeballing (riskier) | Scale gives exact repeats every time |
Mixing and Kneading Ensures Strong and Tender Bread
Getting the dough combined and kneaded sets the stage for texture and chew. By following these next steps closely, you’ll avoid dense or tough loaves and create consistent results.
Gather all ingredients at room temperature before starting. Measure out each one, focusing especially on flour and water, to prevent stickiness or dryness later in the process.
Mixing Dough Step by Step
Add flour, yeast, salt, and any sweetener to your bowl. Gently pour in warm water (and oil if using), then stir with a wooden spoon until a shaggy dough forms.
Once combined, use your hands to bring together any loose flour. The dough should be tacky but not wet, pulling away from the sides of the bowl as you gather it.
If it feels too dry or sticky, add small spoonfuls of water or flour as needed. Listen for a “soft squish” sound—this means hydration levels are correct and gluten development can begin.
- Mix until the dough comes together, avoiding dry pockets. This even base supports proper kneading and rising.
- Add water in small doses. It’s easier to fix a too-stiff dough than a puddle of mush.
- Use hands as a gentle “dough scraper” to bring flour from bowl sides toward the center, incorporating everything without overmixing.
- Rest dough for five minutes if too tough. Short rests relax gluten, making the next step easier and keeping your arms from tiring quickly.
- Notice dough temperature. Slight warmth signals active yeast, a good sign before kneading begins in earnest.
Follow this checklist each time to refine your bake bread simple routine, making your workflow smoother and faster.
Kneading Technique for Structure
Place dough on a floured surface. Push down using your palms, then fold the dough over itself. Turn it 90 degrees and repeat for 8 to 10 minutes.
If the dough starts to stick, add more flour in small amounts or clean your hands and continue. Well-kneaded dough feels smooth, elastic, and springs back under gentle touch.
Kneading resembles taffy pulling; each motion aligns gluten fibers, creating lightness and a satisfying crumb. Practice this motion for better texture and confidence in every loaf.
- Press and fold in a steady rhythm. Consistent kneading means a consistently airy loaf.
- Flour hands just enough to keep dough from sticking, not so much as to dry it out.
- Time your knead—8 to 10 minutes ensures gluten strands develop well for a bake bread simple success.
- Do: Use the whole palm to push. Don’t: Use fingertips, which can tear dough unnecessarily and hinder gluten formation.
- Rotate dough between each motion. This uniformity gives structure to every bite.
With practice and mindful repetition, kneading becomes rhythmic, meditative, and straightforward for any baker.
Proofing: Letting Dough Rise Is Non-Negotiable
Allowing dough to rise fully produces the lightness and air pockets in excellent bread. Skipping or shortening this phase results in flat, dense loaves. Treat proofing as mandatory.
Place the dough in a lightly oiled bowl and cover with a clean, damp cloth. Find a warm, draft-free spot—a microwave with the light on works well—to boost rise and maintain humidity.
Visual Cues to Judge Proofing
Dough should double in size over 45 to 90 minutes, depending on kitchen temperature. If you gently press the dough and the indentation slowly springs back, the rise is just right.
Too short a rise means bread won’t develop flavor or texture. Too long and the dough collapses. Keep a timer or set a phone reminder to check progress at regular intervals.
Common language: “That looks puffy and soft, not dense,” signals readiness. Always use sight and touch, not just time, to confirm your dough is fully proofed.
Recognizing and Fixing Overproofed Dough
If the dough has doubled and risen over the bowl’s edge, it may be overproofed. Overproofed bread deflates easily and bakes up less airy but is still salvageable for toast or croutons.
For a quick fix, punch down the dough and allow a shorter second rise (about 30 minutes). This reinvigorates yeast activity, resulting in a serviceable loaf despite earlier overproofing.
Never let dough rise too close to a radiator or direct sunlight—overly warm conditions encourage wild yeast growth and ruin bread’s structure. A consistent, slightly warm spot yields the best proofing environment.
| Stage | Duration | Observable Sign | What To Do Next |
|---|---|---|---|
| Mixing | 5 minutes | Shaggy dough forms | Begin kneading |
| Kneading | 10 minutes | Smooth, elastic dough | Proof first rise |
| First Proof | 1 hour | Doubles in size | Punch down dough |
| Shaping | 2 minutes | Springy and tight | Second proof |
| Second Proof | 45 minutes | Swells slightly | Bake |
Shaping and Flavor-Boosting Tweaks Make Loaves Stand Out
Shaping bread and adding mix-ins gives home bakers room for creativity without complicating the process. Playing with forms and flavors adds joy and personalization every time you bake bread simple at home.
Shape your dough into mini-loaves, rounds, or rustic sticks using gentle hands. Each style bakes slightly differently, so track timing and coloration to adjust for your favorite outcome.
Adding Flavorful Ingredients at the Right Time
Name additional flavors before kneading—herbs, garlic, dried fruit, or cheese—so they’re evenly distributed. For seeded crusts, press sesame or poppy seeds onto the loaf after the second rise just before baking.
Imagine swirling cinnamon sugar through dough, much like folding chocolate chips into cookies for pockets of flavor. Combine and shape swiftly to stop dough overhandling and maintain rise.
Use whole grains or oats for texture; these absorb extra water, so add 10% more liquid to the recipe for moist, not crumbly, slices. Take notes as you experiment for better results every session.
Shaping Loaves for Even Baking
Flatten proofed dough into a rectangle using your palms—aim for even thickness. Fold both ends into the center and roll gently, tucking edges under for a taut, clean loaf.
Spoken cue: “Tuck in the sides so my bread doesn’t flatten when baking.” A taut loaf bakes up higher and slices more neatly. Rest loaves seam-side down on the baking pan.
For baguettes, roll dough into logs and pinch seams shut underneath. A dusting of cornmeal under shaped loaves prevents sticking and boosts crustiness while baking.
Baking and Timing: Precise Steps for the Golden Crust
Baking at the right temperature for the right duration gives homemade bread its golden crust and spring. Position racks centrally in the oven and preheat fully before sliding in your shaped dough.
Standard loaves bake at 375°F to 425°F. Timing may vary by pan or shape, so check after 20 minutes. Tap the bottom of the bread: when it sounds hollow, it’s done and ready to cool.
Steam and Moisture for Crust Perfection
Pour a cup of hot water into a preheated pan placed on the oven floor. The resulting steam ensures a crackly, crispy crust, similar to your favorite bakery loaves. Don’t skip this step for professional results at home.
The steam technique is adaptable—try spraying the dough lightly with water just as it enters the oven. This prevents premature hardening and allows bread to rise taller during the first ten minutes of baking.
Careful: rushes of steam can scald, so open and close oven doors cautiously. Steam matters for bake bread simple success on par with artisan bakeries.
Cooling and Slicing With Care
Place baked bread on a wire rack for at least 30 minutes before slicing. Warm bread can compress and gum up; cooling preserves crumb texture and makes cutting easier and neater.
Resist the urge to cut straight from the oven. Use a gentle, serrated knife and saw back and forth without pressing down. This approach keeps slices fluffy and visually appealing.
Store cooled loaves in paper bags for daily eating, or freeze portions for longer shelf life. Proper storage preserves the effort and quality of your bake bread simple routine.
Troubleshooting Common Hiccups Brings Consistent Results
When setbacks occur, quick troubleshooting keeps frustration minimal. Address dough stickiness, flat loaves, or streaky crumbs by checking habits and stepping through targeted fixes at every stage.
Sticky dough? Dust with just enough flour to tame tacky areas without over-drying. Flat bread means not enough rise time or expired yeast—always check your time and freshness before starting.
Fixing Dense or Crumbly Texture
Dense bread results when gluten isn’t developed enough. Knead longer next time, or use bread flour instead of all-purpose for more structure. Try an extra teaspoon of yeast for taller, lighter slices.
A crumbly loaf points to not enough hydration. Next time, add extra water a tablespoon at a time during mixing until dough feels tacky but not sticky in your hands.
Both issues are common for anyone who bake bread simple at home, and small adjustments bring major improvements for your next batch.
Preventing Overbaking and Hard Crusts
Check oven temperature with an accurate thermometer. Most home ovens run hot or cool, which affects bread moisture and browning. Lower the rack position if tops brown too quickly but the centers remain soft.
If crusts harden too much, reduce baking time by five minutes and let residual oven heat finish the bake while the bread cools inside. This trick softens crust for next-level texture.
Notice visual cues and practice small bake bread simple tweaks, gradually refining for perfect, reliable results with every loaf.
Keep Your Bread Fresh and Tasty Longer
Storing fresh bread properly keeps it delicious and prevents waste. Cool bread completely before wrapping it up to avoid condensation inside the package, which can turn crusts soggy.
Use paper bags for daily use, which maintain crustiness. For longer storage, slice the bread and freeze in airtight containers, pulling out portions as needed for toast or sandwiches throughout the week.
Refreshing Stale Bread for New Uses
Transform day-old bread by sprinkling slices lightly with water and baking at 350°F for 8 minutes. This rehydrates and crisps up the bread, making it nearly as good as new from the oven.
Turn stale bread into homemade croutons. Cube and toss with olive oil, salt, and any herbs you like, then bake until golden brown for salad toppers with extra crunch and flavor.
Bake bread simple and repurpose leftovers for breadcrumbs. Blitz stale slices in a food processor and use as a coating for chicken or veggies, or as a thickener for soups and stews.
Making Homemade Bread a Reliable Weekly Routine
Establishing a weekly routine brings continuous improvement and satisfaction. Consistency in baking means you quickly recognize what works, building intuition and speed every time you bake bread simple at home.
Set reminders for proof times and gather your tools in one spot. Prep dry ingredients in advance for those busy days. Routine and preparation make home baking stress-free and enjoyable.
Sharing Bread With Others
Gift a fresh loaf to a neighbor with a handwritten note or offer a few slices to a friend during a weekend coffee. These gestures turn a simple recipe into a community-building experience.
Gather family for a weekly bake bread simple session. Assign roles for mixing, shaping, and measuring—kids can sprinkle flour or score loaves for creative fun and memory-making.
Ask for feedback from family or friends after each bake. Notice reactions like “That’s chewy and just sweet enough,” and adjust recipes accordingly. Over time, your homemade bread will become a household favorite.
Frequently Asked Questions
- Why do I need to let bread rise twice? Most recipes use two rises: the first to develop structure and flavor, the second for shaping and texture. Skipping a rise makes bread denser.
- What can I substitute for yeast if I run out? Try a baking powder or self-rising flour quick bread, but results differ. Sourdough starter can also replace yeast if you plan a longer fermentation.
- Can I use whole wheat flour instead of white? Yes. Swap up to half the flour for whole wheat for extra fiber. Use more water, as whole wheat absorbs additional moisture during mixing and kneading.
- Why did my loaf come out too flat? This often results from inactive yeast, too much water, or underproofing. Double-check yeast freshness, stick to precise measurements, and proof until dough is puffy and doubled in size.
- How should I store homemade bread to keep it fresh? Let it cool completely, then wrap in a cotton bag or paper, not plastic. For longer storage, slice and freeze. Avoid refrigerating, as it dries bread out faster than freezing.