Most people wait until socks are truly worn out before considering what to do with them, but those little holes don’t need to spell the end. Knowing how to darn socks naturally extends their useful life, saves money, and keeps favorite pairs around longer.
Each pair carries stories—comfy toes after a long day, quick mornings before coffee, memories of padded walks. Learning sock repair shifts how you view things: ‘broken’ becomes ‘worth fixing.’ Proper darning lets you control your wardrobe’s life cycle.
This article unpacks everything you need for effective sock darning from start to finish. Whether patching your first hole or refining techniques, you’ll get actionable steps, visuals, and pro tips. Read on for a better, longer-lasting sock drawer!
Choosing Materials: Set Yourself Up for Seamless Sock Repair
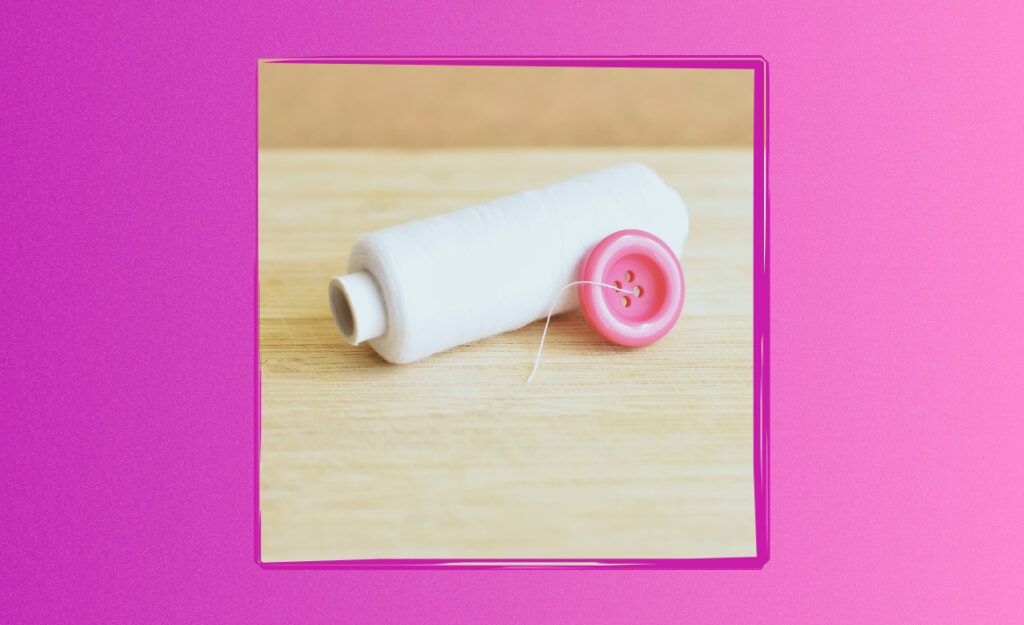
Starting with the right supplies guarantees smoother results. You only need a few basics—yarn, a needle, and a darning egg or mushroom. Darn socks with better quality and comfort by making smart material choices from the start.
Nylon- or wool-blend thread closely matches most commercial socks for strength. Avoid cotton sewing thread for repairs unless a temporary fix is all you need—nylon and wool blend better with elasticity and wear.
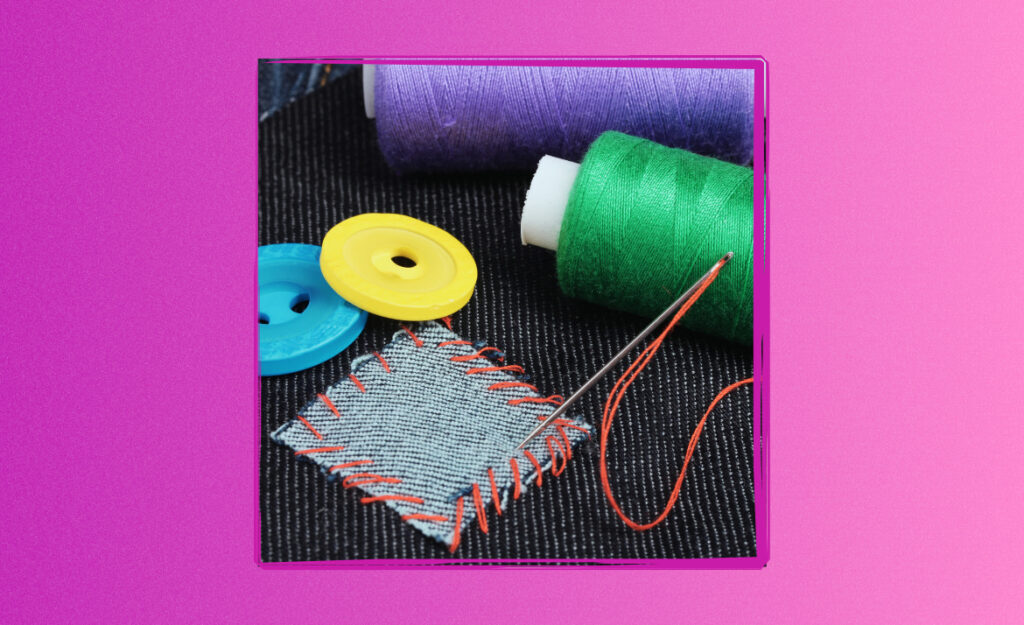
Identify Sock Fabric and Select Suitable Yarn
Turn your sock inside out and locate the label for the fabric content. Find wool-like yarn for thick winter socks, and blend or synthetic yarns for athletic pairs, so the patch flexes naturally with the rest.
Try lightly stretching both your sock and potential patch yarn before starting. The perfect match will snap back at similar rates—this detail stops tightness or bunching around the repair, leading to fewer future holes.
Ask, ‘Does this yarn feel about as stretchy as my sock?’ Hold both several inches apart and tug. If they move together, you’re good to go for a strong, seamless darn.
Selecting the Right Needle and Darning Surface
Darning needles offer wider eyes and blunt tips. Aim for one just thick enough to thread your chosen yarn without fraying it. Blunt ends slide through knit fabric without snagging or splitting entire fibers.
Place a darning egg, mushroom, or even a tense ball of wadded paper inside the sock at the repair location. This keeps the fabric taut and apart, making it easier to see the hole and guide your stitches evenly.
Think of a darning egg as training wheels; it supports the fabric just enough for smooth, controlled repair work. This setup ensures holes don’t shrink or shift mid-stitch.
| Material | Use Case | Recommended Tool | Next Step |
|---|---|---|---|
| Wool yarn | Thick winter socks | Large-eyed darning needle | Match yarn stretch before starting |
| Synthetic blend | Athletic, dress socks | Medium darning needle | Layer thin yarn for durability |
| Nylon thread | Reinforcement, heel/ball pads | Small tapestry needle | Use doubles for strength |
| Darning egg | Stretch fabric evenly | N/A | Insert before repairing |
| Cotton thread | Emergency fixes only | Sharp sewing needle | Replace later with matching yarn |
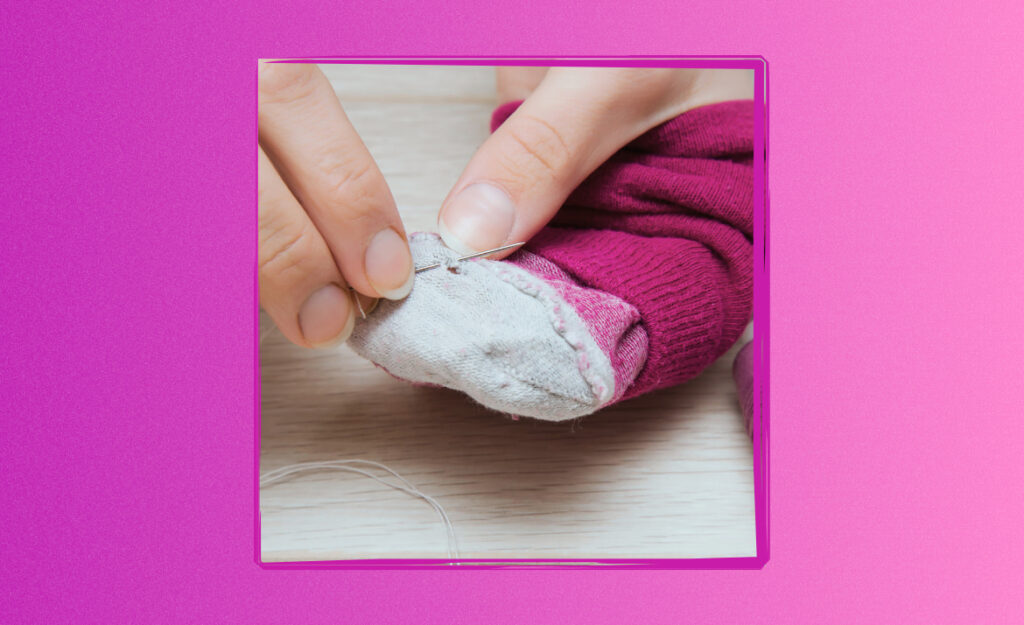
Performing a Basic Darn: The Weaving Technique for Beginners
Learning the weaving method to darn socks gives you a reliable process to address most holes. Darn socks with simple, overlapping lines that miraculously restore both looks and function to torn toes or heels.
Start by laying your sock flat with the hole centered over your darning egg. Thread your needle with about 18 inches of matching yarn and tie a firm knot at the end to anchor your first pass.
Basic Process: Establish a Strong Foundation
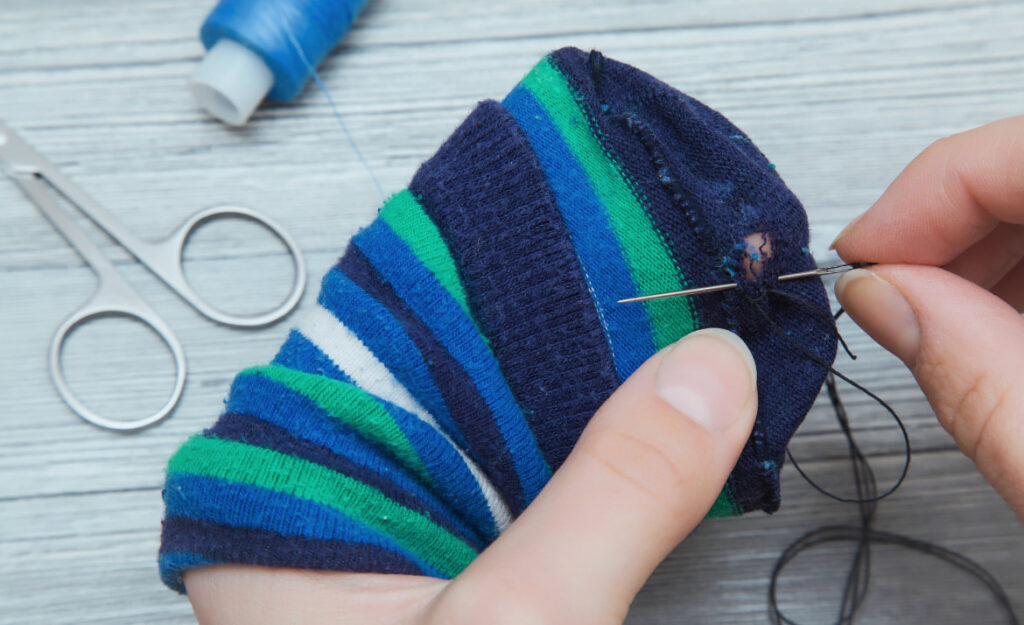
Stitch around the hole’s border first, running the needle under a row, over the next, circling the opening. This edge anchors your repair and keeps the hole from stretching open while you weave your patch.
Use language like, “I’m just tacking the edge down,” as you quietly work around the circle. A solid foundation makes the repair easier, and you can feel confident the yarn won’t rip out with wear.
Once you’ve secured the outline, begin stitching in parallel lines from top to bottom, passing across the hole. Keep lines close—but not tight—since socks need flexibility to stretch as you walk.
Finish the Weave: Cross and Lock the Patch
Turn the sock and start weaving perpendicular threads at right angles to the first set, passing alternatively over and under the established strands. This forms a woven net that mimics original fabric structure.
Don’t pull the yarn too tight—keep everything flat, just like a woven basket. If your patch puckers, loosen up a little on your next pass. Flexibility is your goal for lasting comfort.
When your patch floats level with the rest of the sock, tie off the end by passing the yarn through several previous stitches. Clip excess yarn close. This creates a secure, invisible finish that won’t unravel next wash.
- Thread a needle with matching yarn for best results—matching helps disguise repair and keeps the fabric texture smooth.
- Anchor around the hole first so your patch doesn’t pop out as you weave; this provides strength on all sides.
- Weave strands loosely, not tightly; healthy flexibility makes the patch conform to your foot’s shape as you move.
- Alternate over-and-under as you weave perpendicular threads; mimicking a woven basket creates a solid, wear-resistant patch.
- Finish by tying off yarn ends through multiple stitches for maximum durability—and no scratchy knots inside your sock!
Even your first attempt will feel rewarding. Practicing these steps a few times brings fast improvement, so each repair fits better and lasts longer.
Quick Technique Guide for Knitted Socks
Choose a spot with good light and minimal distractions for your repair work; clear sightlines ensure even tension. Lay everything out within reach so each step flows without hunting for materials.
- Cut enough yarn for the repair—a foot or two is usually plenty. Too much yarn tangles easily; too little and you’ll need to tie a new strand during repair.
- Start your border one row away from the hole. This saves partial stitches and keeps the patch secure through future washes and stretches.
- If you snag a loose loop, gently pull it flat before continuing. Fixing this early prevents future snags and uneven wear in your patch area.
- Take regular breaks on your first few repairs. Sore hands or eyes quickly lead to mistakes in tension and pattern.
If you hear, “My sock feels bumpy at the repair,” try thinner yarn or adjust tension. Aim for a patch that blends perfectly by touch.
Extending Sock Life Before Damage Starts
Prevention has a direct payoff. Reinforcing high-friction areas helps darn socks last much longer and delays repairs. Take easy steps now so you aren’t constantly patching the same spots.
The trick: light darning on heels and toes right after purchase. Add reinforcement where wear appears first, so fabric doesn’t thin out. This applies to kid’s, hiking, or everyday work socks.
Preventive Reinforcement for Heels and Toes
Pick matching or clear nylon thread and add closely spaced stitches across heel and toe zones. Work from inside the sock, just as you would patch a hole, but stop before the area feels thick or hard.
- Check new socks for weak spots or loose yarn as soon as you buy them. Address tiny issues before they expand, preventing big repairs later on.
- Wash new socks inside out. This prevents abrasion from rough laundry drums and keeps surface fibers smooth.
- Tumble dry on low (or air dry) to make fibers last. Excessive heat weakens elastic and contributes to hole formation.
- Rotate between pairs often. Give socks time to rest and their worn zones recover elasticity, extending their usability.
- Store socks flat and unbunched. Rolled cuffs slowly stretch the elastic, leading to premature thinning around stretch points.
Effective prevention means fewer rushed repairs, longer-lasting comfort, and a consistently fresh-looking sock drawer. You gain more wear out of every pair with just a little planning.
Proper Washing Makes Repairs Last
Machine-wash socks in mesh bags to avoid snags, which can develop into holes. This also protects freshly darned zones from catching on rougher clothes or hardware inside the machine.
- Fasten Velcro and zip all zippers in laundry loads. These attachments cause pulls and tears in delicate sock fabrics.
- Use mild detergents—bleach and harsh chemicals weaken sock yarn and reduce darning patch life.
- Skip fabric softeners or dryer sheets; they leave residue, which degrades stretch and stickiness in synthetic fibers.
- Dry socks by laying them flat. Hanging wet socks by the cuffs can stretch out your darning, making repairs less comfortable over time.
- Check socks after every wash for early signs of thinning. Spotting issues early keeps repair jobs quick and unobtrusive.
Caring for your socks this way means your hard work repairing them pays off, keeping your favorite pairs looking, feeling, and performing their best for seasons to come.
Refining Techniques for Specific Sock Types
Different sock types benefit from unique repair strategies. Dress socks, running socks, and cozy woolen socks may require special tools or refinements so your repairs blend seamlessly.
Learning which technique fits each style makes your repairs invisible—and comfy. Darn socks with more confidence and avoid the stiff patches that come from using the wrong yarn, stitch, or tension.
Blending Patches Into Thin Dress Socks
Dress socks are light and close-fitting, demanding fine yarn and smaller needles for repairs. Try silk blend or soft nylon thread, weaving closely and lightly so the patch disappears against the original texture.
If your patch feels stiff or visible through shoes, reduce the yarn count and tension for future repairs. These small tweaks keep your socks work-ready, even after multiple washes and wears.
Use language like, “My dress socks look new again,” when sharing results. Happy results mean you’ll be motivated to keep darning rather than discarding.
Durability for Sports and Wool Socks
Use a slightly heavier hand on athletic or wool socks. Match the plush thickness by doubling yarn and spacing stitches slightly apart, so you mimic original loops without adding bulk.
Check that the patch flexes naturally when bent. If it clumps, use a single strand or different yarn. Aim for a fix that disappears both to the eye and underfoot for athletic comfort.
For colorful or patterned socks, match colors as best possible, but don’t stress over slight shifts—bold patches add a unique, custom touch to heavily-used pairs.
Darning on the Go: Portable Fixes for Busy Lives
Emergencies happen at the least convenient times. Carrying a simple darning kit—needles and mini skeins—means you can save a favorite sock even at work, on trips, or in school.
Squeezing in five-minute mending sessions keeps holes small, repairs nearly invisible, and stress levels lower. Quick fixes prevent a small snag from becoming a large, irreparable gap in your collection.
Building a Pocket Repair Kit
Fill a tiny pouch with a medium darning needle, three wrapped yards of matching yarn, nail clippers, and a soft balled wrapper or darning egg. This setup weighs almost nothing but lets you respond instantly to new holes.
Label the pouch and tuck it beside your notebook or chargers in your bag. Check your socks as you put them on, and set aside minor repairs for your next break or bus ride.
For work trips, add thread in black, gray, and tan—these three shades match most common sock colors and mean you’re ready for emergencies, not just at home, but anywhere.
Case Scenario: Fixing Socks in Real Life
This exact phrase came up last spring: “I just found a hole but don’t have time to shop for new socks!” Keeping a pocket kit let me fix the sock in ten minutes during lunch break.
The result was a patch that felt smooth and lasted for weeks—saving money and frustration. Being prepared means there’s no reason to throw out a favorite pair just for one small hole.
This practical approach builds handy repair habits over time. Even the busiest person can fit a quick five-minute mend into their schedule, keeping their sock drawer full and functional.
Mixing Utility and Creativity With Decorative Darning
Repairs don’t have to be invisible. Decorative darning—sometimes called visible mending—turns flaws into features, showcasing your skills and personality. Darn socks in bright colors, fun shapes, or creative patterns for playful updates.
Choosing unique yarns adds visual flair and highlights your sustainability values. Mixing in blue, orange, or multicolored yarn makes patches feel intentional rather than accidental. The next time someone spots your socks, you can say, “Yeah, I fixed those!”
Simple Decorative Techniques
Switch from a basic weave to zigzag, diamond, or checkerboard stitches. Start around a simple patch, then gradually build new shapes as your confidence grows. Kids especially love socks that feature fun animal patches, initials, or even small flowers.
If you’re nervous about bold thread, test small accents in hidden areas—like toes—first. Select colors that contrast but still please your eye, so you’ll happily wear them anywhere and feel proud of your handiwork.
Over time, even plain socks become part of your unique style story. Visible mending sends the message: you value resourcefulness and individuality over disposable fashion.
Storytelling With Socks
Those wild repairs might spark conversations, too. Friends may comment, “Where’d you get those?” Allowing darning to show off becomes a low-pressure way to encourage repair and reuse among others in your family or community.
Keep photos of your creative socks to inspire kids, friends, or online groups. Each visible mend becomes a small act of advocacy, normalizing resourceful repair as fun, accessible, and rewarding.
As decorative darning grows in popularity, it inspires broader thinking about clothing, value, and environmental care—one repaired sock at a time.
Carrying Forward: Habit-Forming for Lifetime Sock Care
Lasting success comes from building reliable habits. Channeling just 15 minutes a week to darn socks, scan your drawer, and plan repairs keeps your wardrobe in top shape for the long run.
Document repairs—snap a quick photo, jot a date, or note the yarn used—in a small journal. This record helps track which socks wear down fastest, which materials last longest, and which skills you want to develop next.
Building Consistency Through Routine
Each Saturday morning, take out a few pairs and check them for weak zones. Having a set time ensures you’re not surprised by sudden holes on a busy morning. A weekly rhythm reduces stress and boosts repair confidence.
Encourage family participation. Kids love tiny repair jobs, and seeing adults fix clothes naturally teaches self-reliance and care. Sharing this routine becomes a wholesome, shared household tradition.
Cheer each win—finishing a difficult patch or rescuing a sentimental pair—with a favorite treat or small celebration. Positive reinforcement keeps the habit fun, not a chore.
Frequently Asked Questions
What yarn should I use for darning socks?
Darn socks using yarn that matches the original fabric in elasticity and fiber type. For wool socks, use wool or synthetic blends. For athletic or thin socks, nylon thread or finely spun yarn will blend well and last longer than cotton.
Do I need a darning egg or mushroom?
A darning egg isn’t strictly required but makes the process much easier. It keeps tension even and avoids fabric puckering. You can improvise with a small ball, tightly wadded paper, or a smooth rock if needed for similar benefit.
How do I prevent repaired areas from feeling uncomfortable?
Keep stitches loose and flat so they don’t rub against your skin. Test your patch by slipping the sock on and feeling for lumps. Adjust yarn thickness or switch to a finer needle if repairs feel too rough or stiff.
Is visible (decorative) darning as durable as invisible?
Visible or creative darning is just as strong, provided you use correct technique and quality materials. The style you choose—bold or subtle—doesn’t affect durability. What matters is anchoring edges and weaving securely through the fabric.
How many times can I repair the same sock?
You can repair socks multiple times as long as the base fabric remains strong. When the area becomes too thin or patch material overtakes the sock, retire it or upcycle for crafts. Most socks withstand two or more darning jobs in different areas before wearing out entirely.