Few things make daily life at home smoother than being prepared when something breaks or needs adjusting. A well-chosen home toolkit brings a bit of control to surprises, whether it’s a loose cabinet knob or a new shelf.
Savvy homeowners and apartment dwellers alike see practical value in gathering the right tools—even a compact set. A home toolkit turns everyday hassles into quick, manageable moments instead of drawn-out frustrations or expensive appointments.
This guide walks through building a smart home toolkit and using it confidently for minor tasks. You’ll discover skills, strategies, and realistic ideas you can put to use immediately—no extra stress required.
Selecting Essentials That Fit Your Home’s Needs
Identifying core tools gives your home toolkit purpose. Knowing which to pick means you’re always ready for the next picture to hang or tight screw to adjust.
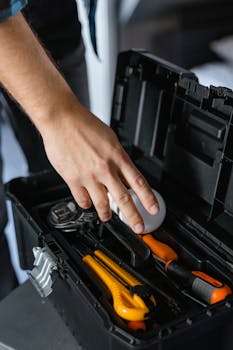
A small, tailored toolkit saves space and time. Go for quality over quantity—each tool should earn its spot based on your real needs, not just what’s trending.
Choosing Tools for Frequent Fixes and Adjustments
Start with a medium-sized Phillips screwdriver, a flathead driver, and an adjustable wrench. These cover most hardware, furniture, and appliance screws or bolts you’ll face at home.
Add a sturdy tape measure and a utility knife. When you unbox furniture or need to cut packaging, you’ll avoid kitchen scissors frustration and finish tasks much faster.
Include a hammer and a pair of slip-joint pliers. These tackle nails, quick repairs to frames, and sticking hardware efficiently. The right mix makes your home toolkit truly versatile.
Adapting for Daily Use Versus Emergency Tasks
A compact flashlight may not be flashy, but when the power goes out or something drops behind the washing machine, you’ll see its value instantly. Keep it in your home toolkit for emergencies.
Store a roll of duct tape and a small box of assorted screws and picture hangers. These staples meet quick fixes without needing to run to the store mid-project.
If certain tasks pop up more—like tightening loose hinges every week—add a ratcheting screwdriver or fix-all adhesive. Customizing your home toolkit means you solve your own common issues, not just generic ones.
| Tool | Primary Use | When To Grab It | Takeaway |
|---|---|---|---|
| Phillips Screwdriver | Tightening/loosening screws with cross patterns | Furniture, outlet covers | Store in your home toolkit for most hardware jobs |
| Flathead Driver | Wide, single-groove screws | Appliances, plates, brackets | Essential for many basic adjustments |
| Hammer | Nails, small demolition | Picture hanging, minor repairs | Pick a lighter hammer for comfort |
| Tape Measure | Measuring lengths and widths | Furniture, curtain rods, shelves | Removes guesswork from project prep |
| Utility Knife | Cutting, trimming | Opening packages, trimming carpet, precise jobs | Pick retractable blades for safety |
Deciding When to Reach for Your Toolkit
Knowing exactly when to use your home toolkit builds confidence and helps avoid unnecessary calls for help. You become the first fixer for simple household situations and basic maintenance.
Observe, diagnose, and act. By pausing to evaluate a situation, you’ll know when a screwdriver is enough—versus when a project needs professional expertise or tools you don’t have.
Spotting Situations for DIY Versus Professional Help
When you spot a dripping faucet, a loose cabinet knob, or a wobbly chair leg, grab your home toolkit. These are manageable fixes for most people with basic skills.
- Fix a leaking showerhead: Tighten with adjustable pliers, reset washer if needed. Saves time waiting for a plumber.
- Tighten door handles: Phillips screwdriver repair. Prevents damage or break-ins and only takes minutes.
- Patch minor drywall: Apply premixed spackle with a putty knife for small holes, then sand and repaint for a fresh look.
- Replace appliance batteries: Use tiny screwdrivers for remotes or kitchen scales. No need to buy replacements.
- Unstick windows: Work a utility knife along jammed edges, gently prying. Avoids harsher solutions that damage paint or glass.
Each task above builds your confidence and reduces dependency on outside services, saving potential costs and time.
Establishing Boundaries for Safe DIY Fixes
Sometimes that home toolkit isn’t the answer—like when a breaker trips repeatedly or water sprays from a pipe. Recognizing your limits protects your home and safety.
- Electrical emergencies: Turn off power, call licensed experts. Never attempt wiring without experience or permits.
- Serious leaks: Shut water supply, mop excess, and get plumbing help. Avoid structural or mold problems.
- Gas smell: Evacuate and contact your gas provider. Never investigate with tools—safety comes first.
- Roof damage: Cover minor leaks with tarp, but don’t climb roofs alone. Hire professionals with the right gear.
- Wall cracks extending or sagging ceilings: Document damage and consult a contractor before patching or painting. Underlying structural issues demand expert assessment.
Knowing your boundaries with your home toolkit is part of being truly self-sufficient and careful.
Building Skills for Confident At-Home Repairs
Developing hands-on confidence with your home toolkit needs more than just buying tools. Repetition, small experiments, and know-how can turn nerves into practical action the next time you spot a repair job.
Starting with Practice on Low-Risk Fixes
Pick out a creaky hinge, loose doorknob, or picture frame with a worn wire. Bring your home toolkit and look up how-to guides or videos tailored to your actual fix.
Work slowly, read instructions, and pause if you feel uncertain. Each tiny win boosts confidence and turns basic fixes into second nature, rather than frustrating chores.
As you finish each project, put tools away neatly. This sets a routine—when you reach for your home toolkit, you’ll always know exactly where each piece is and what’s ready for next time.
Applying Knowledge Through Real Scenarios
Your friend says, “My kitchen drawer sticks every morning… what would you do?” You grab your home toolkit’s screwdriver, remove the drawer, and check the runner. A little tightening and adjustment fix daily annoyance immediately.
Or during a move, a shelf needs to be disassembled. You offer to help, knowing exactly which hex key to pull from your home toolkit and how to keep screws organized for reassembly later.
Each of these moments proves your skills. The real reward is not just the fix, but the sense of agency it brings—the home toolkit is your badge of capability at home.
Establishing Maintenance Habits to Prevent Home Neglect
Regular attention keeps your home safer and more comfortable. Using a home toolkit for preventive action reduces stressful surprises and creates a culture of care you feel every week.
Set a reminder every Sunday to spend ten minutes checking door handles, testing smoke detectors, or tightening shelves. This habit can stop small annoyances from turning into bigger expenses.
Simple Routine Checklist for Toolkit Users
Make a short checklist that matches your living space and lifestyle. Scan each area with your home toolkit in hand and address tiny repairs immediately instead of letting them pile up.
You could add batteries to detectors, oil hinges, or tighten wobbly legs on your favorite chair. It’s the difference between calm mornings and distracted days spent ignoring the little things.
Personalize your list and keep it near your home toolkit. Over time, these weekly habits will feel like maintenance on autopilot, not chores to dread or delay.
Choosing the Right Storage and Organization for Your Toolkit
Proper storage ensures your home toolkit stays accessible and organized, saving seconds in urgent situations and preventing lost tools. Consistent organization lets you find what you need without digging or guesswork.
Invest in a compact toolbox or tough plastic tote that holds just your essentials. Label sections or small bags for loose parts, like screws or picture hangers, for rapid retrieval when you need them most.
- Choose a lockable box if you share your home with kids or pets, keeping sharp tools out of reach and improving household safety.
- Arrange tools by frequency—put commonly used screwdrivers and tape in top trays, specialty items below. This saves time when tackling immediate repairs.
- Use small clear containers for nails, adhesive pads, and picture hooks. See-through storage helps avoid duplicate purchases and keeps your toolkit tidy.
- Store your home toolkit in a consistent location, such as a hallway closet or kitchen cupboard—easy to remember and quick to grab for fixes big or small.
- Revisit your organization monthly. Remove broken tools, refresh batteries, and refill items like tape or adhesives so you never run short mid-project.
Well-kept storage habits minimize frustration and mean you’re always ready, not scrambling, the next time a quick repair pops up.
Staying Motivated: Real-World Benefits of Home Toolkit Mastery
Taking action with your home toolkit isn’t just about saving money—it creates peace of mind and a genuine sense of independence. These small wins build up your practical confidence and home pride each week.
When you finish a repair, allow yourself to take credit. Share the experience with housemates or friends: “Look, that hinge works like new—all thanks to the home toolkit in the closet!”
Seeing Progress and Communicating Your Skills
Keep a simple journal or digital list of repairs completed. Over time, you’ll spot patterns—like loose handles after every winter or squeaky doors around humidity changes.
When a rental inspection or guest visit looms, you’ll walk your home and spot zero glaring issues—that’s your preparation in action. Others notice, too, and may ask for your home toolkit tips.
Your results stand out. Not only do you fix things, you create a home environment that runs more smoothly and comfortably for everyone inside.
Frequently Asked Questions
What are the absolute essentials everyone should keep in a home toolkit?
A hammer, Phillips and flathead screwdrivers, pliers, adjustable wrench, tape measure, sturdy utility knife, duct tape, and a flashlight cover basics. Add screws, hooks, or small fasteners based on your own typical home tasks.
How can I make building my toolkit more affordable?
Start with used tools from garage sales or thrift shops, then fill gaps as needs arise. Prioritize multi-use tools and fill in specialized items only after you’ve run into real situations that call for them.
How do I know when to stop and call a professional?
When tasks involve wiring, plumbing leaks beyond a minor drip, or structural damage, step back and consult a licensed expert. Your home toolkit handles small jobs, but your safety and property value matter more than finishing a project alone.
What’s the best place to store my toolkit so I always remember it?
Choose a central, visible location such as a hallway closet or the kitchen—somewhere you’ll see it once a week. Consistent placement ensures you build a routine of reaching for your toolkit when small issues arise.
What routine maintenance tasks will minimize emergencies in the future?
Test smoke detectors monthly, lubricate door hinges each season, tighten cabinet hardware, and check for water leaks beneath sinks. Your home toolkit makes these quick fixes simple, and keeps your home running smoothly over time.