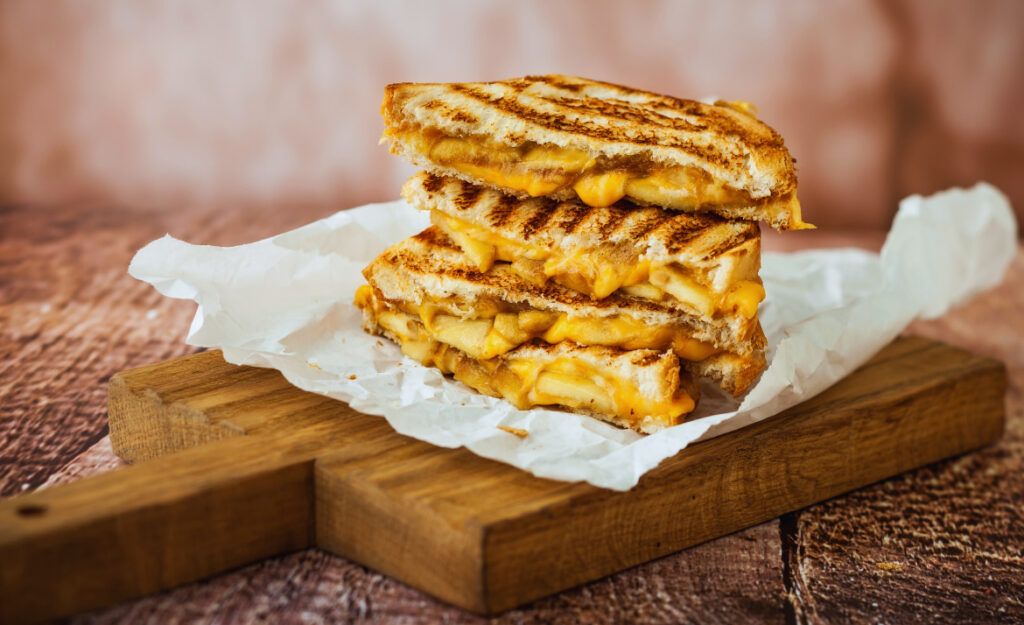
The first bite of a perfectly-grilled sandwich is unforgettable—warming, crunchy, and simple, yet satisfying. Anyone chasing that ideal texture knows, a perfect grilled cheese isn’t just about gooey insides. It’s about that golden, crispy finish with just the right bite.
People have experimented with different breads, cheeses, and spreads, but the perfect grilled cheese consistently comes down to a straightforward set of choices and techniques. Each step makes a difference, right down to the little things—like flipping speed or bread thickness.
If you want your grilled cheese sandwich to impress with its crunch and flavor, you’ve come to the right place. Let’s dig into the tasty details and proven tips to up your grilled cheese game at home.
Fry Food Light Without Losing Flavor: Smart Techniques
Learn expert strategies to fry food light for crisp, flavorful meals. Master the right oils, coatings, seasonings, and tools for healthy, restaurant-quality fried favorites every time.Choosing the Bread: Start With Structure For Real Crunch
Crunch starts with bread that toasts evenly and holds up to the filling. A perfect grilled cheese depends on the right bread just as much as technique.
Skip soft, thin slices in favor of rustic sourdough or firm white bread. Hearty slices deliver better crunch and resist becoming soggy as the cheese melts.
Assessing Bread Texture For Best Results
Press the bread with your thumb in the store. If it springs back, it’ll hold up when heated. Floppy or sponge-soft loaf slices often lead to greasy, limp results.
Dennis, a home cook, says, “A fresh bakery loaf always works. I cut thick slices, so even my runniest cheese won’t soak through during grilling.” That extra thickness gives each bite structure.
Choose bread with a tight crumb, not those with big holes. A tight crumb holds in the melted cheese and keeps the sandwich manageable for flipping and slicing.
Comparing Bread Types: Sourdough, White, Brioche, and Rye
Sourdough yields the crunchiest crust because its sturdy texture crisps beautifully on a hot pan. Standard white bread is reliable but burns faster with added sugars.
Brioche gives sweetness and a soft bite but sacrifices some of the desired crisp. Rye bread pairs well with bold cheeses but can overpower delicate flavors. Always sample a small test slice first.
Try toasting each side of plain bread in a skillet before assembling your sandwich. This rule helps remove some moisture that would otherwise soften your final crust, ensuring a flavorful crunch.
| Bread | Texture | Flavor Impact | Best Use Tip |
|---|---|---|---|
| Sourdough | Thick, rustic | Tangy, robust | Brush with butter, grill longer for extra crunch |
| White sandwich | Soft, tight crumb | Mild, classic | Toast gently, avoid over-browning |
| Brioche | Light, tender | Sweet, rich | Pair with salty or sharp cheese |
| Whole Wheat | Grainy, chewy | Nutty, earthy | Try hearty fillings to balance texture |
| Rye | Dense, firm | Savory, spiced | Use with bold cheeses, toast for shorter time |
Cheese Choices That Melt and Stretch With Every Bite
Melty cheese is central to the perfect grilled cheese. Prioritize stretch and flavor over just name recognition. Selecting the right variety will upgrade every sandwich you make.
Grating cheese creates a more even melt compared to slices since it fills gaps and softens quickly. This ensures every bite features both gooey and crispy sensations.
Blend Cheeses For Ultimate Texture and Taste
A cheddar-mozzarella mix is a go-to for many. Cheddar delivers sharpness and the signature ‘pull’ while mozzarella contributes classic melt. Layer these together for a well-rounded, craveable sandwich.
- Shred fresh cheese to guarantee smooth melting, then press it lightly between the slices.
- Add a slice of creamy Havarti for extra richness, which marries nicely with sharp cheddar.
- For bold flavor, try smoked gouda or aged provolone in moderation—they shine best alongside milder cheese.
- Reserve processed singles for nostalgia—they melt easily but lack complexity.
- Combine three cheeses for a “grown-up” grilled cheese: sharp cheddar, gruyere, and colby-jack, spread evenly for contrast in each bite.
An analogy: think of cheese like layers of a great playlist. Mix mellow tracks with energetic beats for balance, ensuring the whole sandwich brings excitement without monotony.
Dairy Alternatives and Melting Quality
Vegan cheese options vary wildly. Some melt as smoothly as dairy selections while others remain firm. Look for coconut oil-based or cashew cheese slices for the closest texture to the real thing.
- Select brands labeled “melts well” to avoid rubbery results—check packaging photos and reviews before trying new options.
- Try adding thin tomato slices between vegan cheese layers; moisture helps their melt and adds fresh flavor.
- If the vegan cheese remains stiff, briefly cover the pan during cooking. Steam jumpstarts melting without compromising a crispy finish below.
- To increase creaminess, mix vegan shredded style with a thin spread of vegan cream cheese for rich mouthfeel.
- Always taste-test before serving. Vegan blends occasionally need a pinch more salt than dairy, so adjust seasoning accordingly.
Plant-based options empower everyone to enjoy their own perfect grilled cheese. Just treat your substitutes with attention, and use the best melting techniques described above.
Buttering and Spreading: Keys to a Crispy, Even Finish
Spreading technique is the secret sauce for crunch. Even, edge-to-edge application prevents burnt patches and creates a consistent golden brown finish throughout each bite of your perfect grilled cheese.
Use softened butter, not melted, to stay in control. Take time to coat the bread fully, using a flexible offset spatula to reach corners without tearing delicate bread.
Use Mayo for Extra Crispness
Mayo creates a blistered, restaurant-style crust because it includes both oil and eggs, which brown at a higher temperature. Spread a gentle layer before grilling if you want extra crunch.
One home cook explains: “Butter gives flavor, but a very light layer of mayo is my insurance policy for crispiness.” This trick works especially well on softer or sweet breads.
Still, for purists, high-quality European butter wins on both nostalgia and richness. Use a blend of both—half butter, half mayo—for the best of both worlds.
- Spread butter evenly to the very edges of each slice to avoid dull spots.
- Try a half-and-half blend of butter and mayo for a boost in both taste and crunch levels.
- If using olive oil, brush on with a pastry brush to prevent sogginess; oil burns more quickly, so use a lower heat.
- Don’t overdo it. A thin layer per side achieves crunch without greasiness.
- Test different combinations to discover your household’s favorite texture and flavor profile.
Prep your bread first, then set aside. A ready-to-go piece is less likely to lose adhesive butter or spread before hitting the hot pan, helping ensure an even, satisfying brown on both sides.
Control Heat for Steady, Distinct Layers of Crunch and Melt
Careful control over heat on the stovetop is non-negotiable. Medium heat works best. If it’s too hot, bread burns before cheese melts. Too low, and the sandwich dries out without developing that crispy finish.
Place your buttered bread, spread side down, on a preheated pan. You’ll hear gentle sizzling, but never smoking. Adjust the burner if you notice uneven browning after the first minute or two—responsiveness is key.
Sear, Then Drop the Heat
A professional trick: start with a hot pan for the initial sear, creating an immediate crust, then reduce the heat to medium-low to allow the cheese inside to melt slowly.
This two-step heat method delivers bread that’s golden and crunchy outside with cheese that’s gooey but not runny. Time your flip carefully, usually when the bottom smells toasty and the cheese edges start to soften.
If the cheese isn’t fully melted when the bread reaches the perfect color, cover the pan loosely with a lid to briefly trap steam, giving your perfect grilled cheese a finished melt without compromising crunchiness.
Consider Pan Choices: Cast Iron, Non-Stick, or Griddle
Cast iron produces the most even, high-heat sear. Non-stick pans make flipping easier and are more forgiving at higher heats for beginners. Countertop griddles allow for multiple sandwiches and steady browning control.
Use cast iron if you want pronounced grill marks, echoing methods in busy diner kitchens. Non-stick is ideal for basic weekday sandwiches that are easier to handle and clean up afterwards.
Test each setup at least once to discover your favorite. Many cooks rotate between pans depending on time of day or cooking volume—they all become valuable tools in pursuit of the perfect grilled cheese.
| Heat Setting | Color Goal | Approximate Time Per Side | Tip |
|---|---|---|---|
| High/Initial Sear | Light golden | 1 minute | Reduce heat after placing sandwich |
| Medium | Deep golden | 2-3 minutes | Great for slow melting; don’t rush flip |
| Low | Soft brown | 3-4 minutes | Use only if cheese burns easily |
| Covered | Steam-melted | 30-60 seconds end | Add lid only at end for cheese melt |
| Broil (Oven) | Even crust, less crunch | 2-3 minutes | Best for multiple sandwiches at once |
Letting the Sandwich Rest: The Pause for Perfection
Resting your grilled cheese for a minute after cooking helps settle the flavors and keeps cheese from spilling out during cutting. This step makes a surprising difference for sliceability and overall experience.
Use a cutting board rather than a plate so condensation doesn’t soften that perfectly crisp crust. The pause lets steam dissipate and gives layers time to hold together.
Slicing for Best Texture and Appeal
Slicing on the diagonal exposes more of the melty cheese, creating irresistible pull-apart moments. A sharp serrated knife trims through the crust without smashing the bread underneath.
A straight slice is classic but less dramatic in presentation. Whichever way you cut, make sure the cheese stretches with just a bit of resistance, showing off that perfect grilled cheese glue.
Encourage everyone at the table to try both methods at least once. Kids love the drama of the diagonal, while adults sometimes gravitate to the nostalgia of rectangular halves.
- Rest the sandwich at least one minute before slicing.
- Cut with a serrated knife for minimal crust damage.
- Slice diagonally for dramatic cheese pulls and visual appeal.
- Use a wooden cutting board to keep the crust crisp.
- Serve immediately to enjoy the ideal crunch-to-melt ratio.
Fun Twists and Add-ins: Take Your Grilled Cheese Further
The classic is hard to beat, but creative add-ins can personalize your perfect grilled cheese. Some subtle ingredients pair remarkably well with the crispy, cheesy foundation you’ve built.
Keep additions light and spread thinly. Overfilling might damage the all-important crisp and make flipping tricky. Every extra ingredient should accentuate—not overwhelm—those signature flavors and textures.
Punchy Condiments, Fresh Greens, or Meaty Surprises
Spread a thin layer of grainy mustard inside for tangy complexity, or slice in a whisper of sweet pickled onion. Arugula brings fresh bite, but use just a few leaves to avoid steam-softening the crust.
Bacon bits or thin-cut ham lend smoky notes, but one slice per sandwich is plenty. Layer meats directly between the cheese layers so they stay moist and meld the flavors nicely.
Try hot honey for a hint of sweetness, or thin apple slices for crunch. Each variation is an excuse for new experiments tailored to your weekly cravings—always in service of that unbeatable foundation.
- Add a small swipe of hot sauce for a kick, but dab with restraint to avoid overpowering the cheese.
- Layer thinly-sliced tomato or pickles for bite, but pat them dry to maintain crunch.
- Swap part of the cheese for sharp blue if you want bold, creamy flavor.
- Mix in roasted red peppers for subtle smokiness and visual contrast.
- For breakfast, top with a fried egg at the finish—pop the yolk with your first bite for creamy richness.
Keep Perfecting: Real Stories and Next-Level Experiments
Each cook discovers their own tweaks that transform a regular sandwich into the perfect grilled cheese. Learning from everyday experiments speeds up your progress.
Chris, after burning a few early attempts, noticed that using salted butter versus unsalted radically changed browning and flavor. Try both and let your tastebuds decide your own house favorite.
Rule-Breaking Combos and Contrasts
Some seasoned home cooks play with umami by adding a dust of parmesan on the outside before grilling. Parmesan crisps up just like breadcrumbs and adds an extra punch to the crust.
Others experiment with a mix of cheeses not generally seen in grilled cheese, such as brie and fontina, or even aged manchego for a Spanish twist. These combos require careful melting but deliver remarkable flavor.
Jennifer’s tip: “Try finishing with a tiny pinch of flaky salt right as you pull the sandwich from the pan. It makes each bite pop.”
Troubleshooting: rescuing less-than-perfect grilled cheese
If you spot smoke before the bread browns, pull it off the heat immediately, wipe the pan, and lower the temp for the next try.
An under-melted center signals too high a flame. Next time, drop the heat, cover loosely after flipping, and practice patience—slow melting always wins over burnt outsides and cold middles.
Don’t be afraid to tweak your routine. The path to perfect grilled cheese is all about fine-tuning: adjust spread consistency, cooking time, or cheese blend until you find your best bite.
Conclusion: Bringing Home the Perfect Grilled Cheese
Experimenting with bread, cheese, and spreads lets you develop a signature perfect grilled cheese method that fits both your kitchen and your palette.
Whether you love sharp cheeses or a classic white slice, aiming for a crispy, even finish ensures each sandwich is memorable. These small details add up to big results during future lunches and late-night snacks.
Let subtle steps—like even buttering, careful heat control, and thoughtful cutting—become your toolkit for a reliably irresistible, crunchy, gooey sandwich every time.
Frequently Asked Questions
- What’s the best cheese for perfect grilled cheese?
Cheddar and mozzarella blend delivers classic melt and flavor. Try gruyere or provolone for complexity. Grate cheese yourself for even, gooey melting with fewer clumps. - How do I keep the bread from burning before the cheese melts?
Keep the pan at medium or medium-low heat, and use a two-stage approach—sear quickly, then lower heat and cover briefly. This guarantees crisp crust with melted centers. - Is it better to use butter or mayo for grilling the bread?
Butter offers rich flavor and nostalgia. Mayo lends extra crispiness. Many prefer a thin layer of each for the ultimate combination of crunch and taste, but either works solo. - What extras can go inside a grilled cheese without losing crunch?
Thin add-ins like pickles, tomatoes, or arugula boost flavor and texture. Keep portions small and ingredients dry to prevent soggy bread and maintain an ultra-crispy finish. - Can I use gluten-free bread and still get a crispy result?
Yes, opt for denser gluten-free loaves with tight crumb and toast each side before assembly. Pair with cheeses that melt easily, and always use a non-stick pan for best results.