Stickers sometimes pop up where you least want them: car bumpers, laptops, furniture, or glass. The urge to remove stickers easily grows as residue turns sticky and unsightly. Nobody wants scratches or damaged paint in the process.
Whether you’re redecorating or removing a child’s art project, tackling stuck-on labels can feel daunting. You risk frustration or permanent surface marks if you use the wrong method. Fortunately, practical routines ensure gentle, surface-safe results.
This article guides you through step-by-step strategies to banish stickers and residue while preserving what’s underneath. You’ll walk away equipped to conquer stubborn adhesives without harming your belongings or the finish you value.
Straighten Wall Frames Effortlessly: Solutions for Tidy Walls
Discover easy, lasting ways to straighten wall frames and create perfectly styled rooms. No tools or fuss—just smart fixes, real-life tips, and tidy walls every day.Identifying Sticker Material Unlocks the Right Strategy
You’ll remove stickers easily when you match your approach to the sticker’s material and the surface involved. Understanding what type you’re dealing with—the paper label, vinyl sticker, or security seal—ensures you select the right gentle removal strategy.
Peeling off a standard paper sticker from glass feels different from tackling a holographic decal on a painted wall. Choosing the right method depends on sticker material cues: thickness, transparency, and texture.
Paper Stickers: Easy Lifts for Porous Surfaces
Paper stickers soak up heat and moisture readily, making them forgiving on surfaces like glass or plastic. Wet a cloth with warm water. Hold it on the sticker for thirty seconds, then peel slowly from one edge.
If any paper residue remains, dab with more water and gently rub in circles. Avoid sharp scraping tools, which may gouge into paint or plastic. The patience pays off, as surfaces are left unharmed.
Sticky paper bits left behind can be softened using a few drops of dish soap mixed with water. Rub lightly using your fingertips until the adhesive dissolves, then rinse and dry.
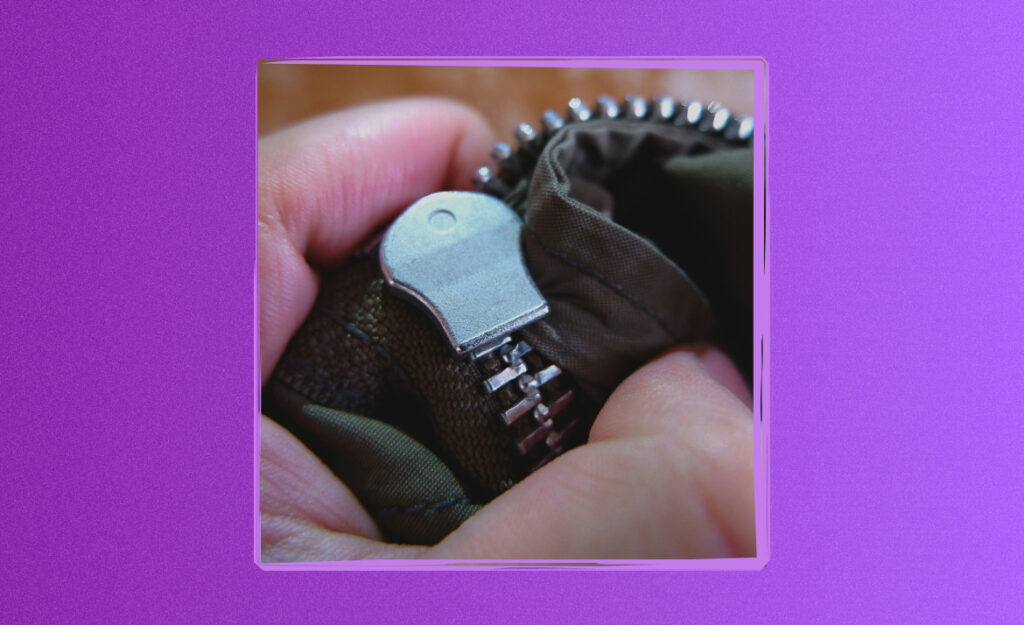
Vinyl and Glossy Stickers: Loosening Without Marks
Vinyl, holographic, and glossy stickers repel water and may leave a more stubborn adhesive. Use low heat, like a hair dryer on its lowest setting for 30 seconds, to help the sticker release cleanly.
As the adhesive softens, slide a plastic card or fingernail under one corner. Move slowly; tugging quickly can stretch or tear the sticker, making cleanup trickier. Repeat the process if the sticker resists.
For glossy stickers on screens or laptops, hold the hair dryer a few inches away. Never let heat linger in one spot. Residue can be wiped away with a little isopropyl alcohol on a soft cloth.
| Sticker Type | Surface Examples | Best Removal Method | What to Do Next |
|---|---|---|---|
| Paper | Glass, plastic | Warm, wet cloth | Peel slowly, wipe residue |
| Vinyl/Glossy | Laptops, painted surfaces | Low heat, plastic card | Remove with care, avoid excessive heat |
| Security/Anti-tamper | Electronics, packaging | Mild alcohol, patient peeling | Test in a corner for safety |
| Foil | Books, plastics | Oil-based remover, careful wipe | Use paper towel, gentle motions |
| Removable Labels | Cardboard, metal | Manual peel, dry cloth | Discard sticker, check for residue |
Gathering Supplies Delivers Cleaner, Damage-Free Results
Having the right supplies at your fingertips means you remove stickers easily without last-minute scrambles. Better preparation prevents accidental scratches or incomplete removal, protecting surfaces, and saves you frustration and time.
Keep a modest toolkit on standby in a kitchen drawer or supply closet. The items below provide maximum flexibility for tackling stickers on a wide array of household objects.
Everyday Essentials for Sticker Removal
Equip yourself with basic tools you likely already own to remove stickers. Assemble a set with a plastic card, microfiber cloth, cotton swabs, and dish soap. Keep isopropyl alcohol handy for electronics and oil-based residue.
- Wet microfiber cloth: Wrap a slightly damp, soft microfiber cloth around your finger. It’s perfect for general wiping or final polishing after adhesive removal.
- Plastic card: Old loyalty or gift cards make safe scrapers that won’t mar surfaces; always use gentle pressure and short strokes.
- Isopropyl alcohol: Dissolves sticky residue without leaving streaks; apply using a cloth for spot applications only.
- Hair dryer: Only use its lowest setting to loosen glue from sturdy items; never overheat surfaces like plastic which may warp.
- Dish soap: Mix a drop with warm water for a safe, non-abrasive cleaner that’s friendly on skin and most household surfaces.
Each of these supplies serves a unique purpose—adapt as needed for your scenario. You’ll quickly learn your favorites for different jobs.
Adhesive Removers and Oils for Stubborn Stickers
For tough adhesives, household oils or commercial removers help break down residues quickly. Always test in an inconspicuous spot first, especially on finished wood or electronics.
- Olive oil: A few drops massaged into residual glue softens sticky patches so you can wipe them away; perfect for glass or metal.
- Rubbing alcohol: This is excellent for electronics and hard plastics; it dries fast and won’t leave streaks if used sparingly.
- White vinegar: Works for paper and basic household surfaces; dampen a cloth and apply small dabs, then rub gently.
- Commercial adhesive remover: Designed to break down labels used on retail items; always check label for compatibility with surfaces first.
- Peanut butter: The oils in peanut butter can dissolve some stubborn glue on glass or metal, though it’s messy and requires thorough cleaning after.
After using sticky removers, always wash surfaces with soapy water to remove any oil or residual chemicals, then dry immediately to prevent streaking.
Following a Step-by-Step Process Prevents Accidental Damage
Planning your removal approach ensures you work smoothly, minimize mistakes, and protect your belongings. You’ll see better results every time you act with a proven sequence rather than guessing.
Start by inspecting the sticker’s corners for signs of lifting or peeling. If you see a raised edge, gently test how freely the sticker lifts; this dictates whether you need moisture, heat, or adhesive breakers first.
Gentle Peeling Method for Surface Protection
Hold the object steady using one hand. Focus gentle pressure near a sticker edge with your finger or plastic card. Begin peeling at an acute angle—instead of pulling upward, peel across the surface.
As more of the sticker lifts, pause occasionally to reapply heat or moisture if resistance increases. A patient, steady hand prevents tearing and limits sticky residue left behind.
Never pry under the sticker with hard metal tools. Even a small slip can scratch paint, glass, or plastic, especially on delicate electronics or furniture with subtle finishes.
Using Heat for Stubborn Residue
Turn the hair dryer to its lowest heat setting and point it at the sticker for 30 seconds. Keep the nozzle a safe distance to avoid overheating plastics or painted wood surfaces.
Test the sticker’s edges again. If you notice softening, roll a plastic card under a corner and gently work side to side. If adhesive remains, reapply heat briefly, wiping the area as you progress.
Keep moving the dryer. Never linger in one area, since this might warp plastic or dull glossy finishes. Always finish by cleaning any residue using a damp microfiber cloth or diluted soapy water.
Protecting Painted, Textured, and Wooden Surfaces During Sticker Removal
Painted, textured, and wooden surfaces are vulnerable to harsh removal techniques. Approach these surfaces with extra caution to remove stickers easily and preserve their integrity. Even gentle methods require attention to surface sensitivity.
For painted walls, avoid sharp scraping or acidic removers, as these can strip color or leave visible blemishes. Test every solution on a small, hidden patch before broader use.
Preserving Painted Walls and Furniture
Moisten a soft, lint-free cloth with warm, soapy water. Pat it onto the sticker for 30–60 seconds, letting moisture permeate paper labels. Lift at a shallow angle, using fingernails or a plastic card.
If glue lingers, dab a cotton swab with diluted rubbing alcohol along the adhesive. Rub minimally, checking for colorfastness after a few seconds. Always dry the spot immediately to prevent water stains or peeling.
Avoid commercial removers and pure alcohol on painted surfaces unless trusted for that finish. The right moisture and patient lifting minimize paint disturbance, ensuring an invisible result.
Managing Textured and Wooden Surfaces
Use the lowest friction method for textured or unfinished wood. Start with a plastic card to gently nudge an edge—you want to work parallel to the wood grain, not across it.
If needed, apply a barely damp cloth heated with a blow dryer for 15 seconds to soften adhesives. As you peel, watch for splintering or color differences. Address any sticky remainings with diluted vinegar or wood-safe cleaner.
Finish by buffing lightly with a dry cloth. For unfinished wood, revisit with a polish or oil to restore the surface’s appearance after cleaning off adhesive remnants.
Careful Steps When Removing Stickers from Electronics and Screens
Electronics and screens require precise, cautious handling for removing stickers. The wrong tool or chemical risks scratches, dullness, or screen malfunction. Always power down devices before beginning your removal routine.
Use gentle, non-abrasive options and work in a clean, dust-free environment to ensure the best result. Never soak electronic items or use wet cloths near openings or ports.
Safe Methods for Laptops, Tablets, and Monitors
Start by using a plastic card or your fingernail to test for an edge. For stubborn stickers, warm the adhesive by waving the hair dryer several inches above the sticker, moving constantly for 10–20 seconds.
Peel the sticker slowly, keeping your pull parallel to the screen or laptop body. If sticky residue remains, dab a microfiber cloth with a drop of isopropyl alcohol and wipe gently, using small circular motions.
Check the manufacturer’s guide before applying chemical solutions. Never use acetone or other harsh solvents, as they could fog the screen or damage touch functionality.
Handling Smartphone Stickers and Accessories
Power off the smartphone, then probe the sticker’s edge with a fingernail. Avoid sharp objects and force. If the device is protected by a case, remove the case first.
Apply minimal heat with your breath or hold the phone under a warm, not hot, lamp for one minute. Lift gently, rolling the sticker rather than yanking.
For sticky marks, use a dampened corner of a microfiber cloth or alcohol wipe; always keep moisture away from buttons and openings. Dry thoroughly before replacing accessories or powering back on.
Immediate Cleanup Ensures Residue-Free, Polished Surfaces
Once labels are gone, address any remnants for that satisfying, like-new finish. Immediate cleanup prevents dust or dirt from sticking to tacky spots and keeps surfaces smooth and gleaming.
Start by examining the area under bright light. If you see shine or stickiness, choose the next move based on your surface type and the size of the affected area.
Final Touches with Homemade Solutions
Create a simple cleaner: mix one part white vinegar to one part water. Dampen a cloth and swipe the sticky area. This removes adhesives from glass, tile, or sealed metal.
For painted surfaces, opt for a few drops of dish soap mixed with warm water instead. Use gentle, circular motions. Finish by wiping damp surfaces dry with a clean microfiber cloth to eliminate streaks or water spots.
If oily patches linger, repeat vinegar solution on glass, or polish with a dry cloth on wood. Always check for cloudiness or color change before treating the entire spot.
Polishing and Maintaining Surfaces
Surfaces need protection after successful sticker removal. On glass, use a store-bought glass cleaner for streak-free clarity. Polished metals benefit from buffing with a soft cloth afterwards.
For wood, apply a dab of polish or oil after residue removal to preserve appearance and prevent drying. Painted walls rarely need more than a final wipe, but check under strong lighting for hidden streaks.
If the finish looks dull, use a surface-appropriate cleaner for a final polish. Avoid waxing until all residue is proven gone. This maintenance step helps prevent future stickers from sticking as firmly.
Putting Sticker Removal Into Routine Practice
Once you master these skills, you’ll remove stickers easily from everyday items with confidence. Spilled juice on a table or a new device at work—no sticker situation remains a mystery.
Repeat your favorite combination of moisture, heat, and gentle scraping on each new label. Over time, refining your process speeds up removal and consistently protects your possessions.
Frequently Asked Questions
- What’s the safest way to remove stickers from painted walls?
Moisten with warm water and dish soap, wait a minute, and lift gently. If sticky residue remains, rub with a diluted alcohol swab. Always test in a hidden corner first. - Can I use a razor blade to scrape off stickers?
It’s not recommended except for glass and only with extreme care. Razors scratch paint, plastic, or wood easily. Use plastic cards or soft cloths instead for best results. - How do I remove stickers from electronics safely?
Power devices off, use a plastic card to nudge an edge, and apply a hair dryer briefly if needed. Clean residue with a microfiber cloth and a dab of isopropyl alcohol far from openings. - What removes sticky residue without harming wood?
Use diluted white vinegar or wood-safe cleaner applied to a soft cloth. Wipe parallel to the wood grain and dry immediately. Avoid strong solvents and never saturate the surface. - Is there a trick for reusable surfaces like lunchboxes or glassware?
Soak labels in warm, soapy water, then slide off with a plastic card. Sticky spots disappear with a drop of olive oil or rubbing alcohol, wiped dry for a polished finish.