
Few things are more annoying than reaching into your closet and finding a shirt missing a button. Knowing how to sew buttons securely means your favorite clothes stick around longer, and you save hassle later.
Clothes endure pulling from bags, active days, and frequent washes, making reliable button sewing a must. Learning to sew buttons the right way isn’t just handy; it directly impacts your wardrobe and wallet.
This article shares techniques, real-life examples, and tips you can follow right away. Whether you sew buttons occasionally or regularly, you’ll gain practical steps to keep them in place for good.
Preparing Your Tools Sets the Foundation for Lasting Buttons
Selecting the best thread, needle, and button for your fabric ensures your handiwork holds up to use. The right start means less rework and longer-lasting results.
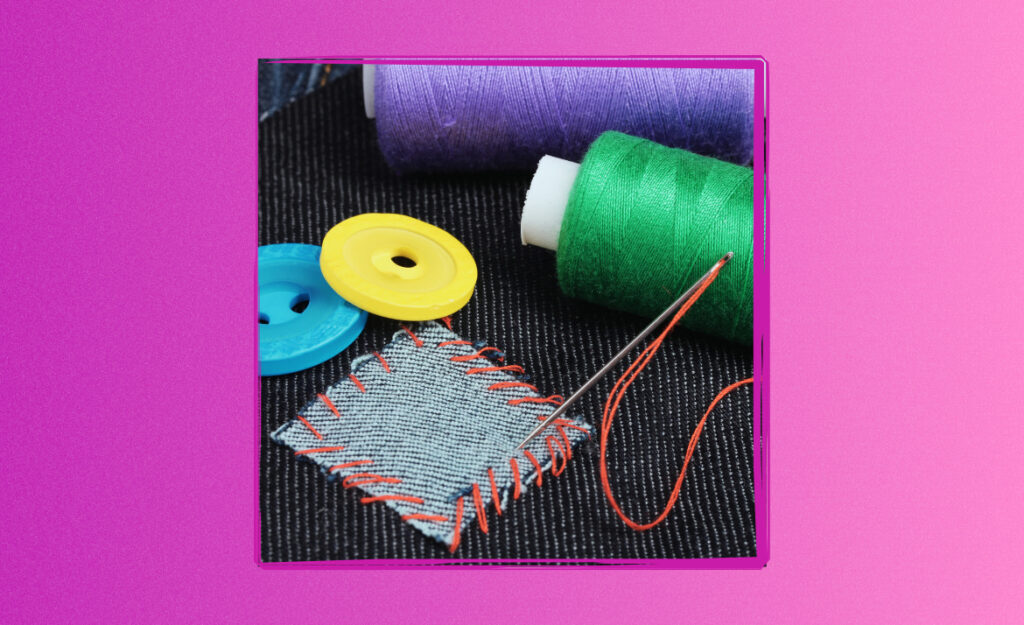
Before you sew buttons onto anything, gather everything you’ll need in one spot. This simple setup step means you’re not scrambling for missing items halfway through the process.
Choosing Tools That Match Your Fabric Weight
For heavy coats or jeans, pick a sturdy needle and thick polyester thread. This combination ensures your buttons stay where you put them, even with repeated tugs and pulls.
On light blouses, a fine needle and cotton or all-purpose thread prevent damage and bulky knots. Imagine threading a tiny needle with matching thread—your results look neat and professional.
Keep extra buttons, sharp scissors, and a small thimble within easy reach. When someone offers, “Do you need help with that shirt?”, you’ll already have every tool at hand and know exactly where to start.
Ensuring Clean, Tangle-Free Thread
Snip your thread to about 18 inches—any longer invites frustration as it twists and tangles. Wax the thread lightly by pulling it through beeswax, then between your fingers, for smooth, seamless sewing.
Pre-cut lengths let you work without interruptions. Before you sew buttons to a heavy garment, threading two strands (doubled) can reinforce the repair dramatically, especially on work shirts or backpacks.
If your thread knots during sewing, pause, untwist, and pull gently. This simple habit keeps your stitches running true from start to finish every time.
| Tool | Fabric Type | Benefit | Takeaway |
|---|---|---|---|
| Sharp Needle | Light, Medium, Heavy | Clean holes, easy entry | Always use a needle matched to fabric thickness to prevent snags |
| Polyester Thread | Medium, Heavy | Strong, resists fraying | For jeans or outerwear, choose polyester every time |
| Cotton Thread | Light, Fine | Blends, soft finish | Best for shirts and delicate items where flexibility matters |
| Thimble | All | Finger protection | Use when pushing needles through stubborn or thick fabric layers |
| Small Scissors | All | Clean cuts, quick snip | Trim thread tails closely for a neat look and secure hold |
Quick Placement Tricks and Secure Button Positioning
Getting consistent button placement the first try means smoother closure and neater lines. With a little prep, each button lands exactly where you want—no guessing or redoing required.
Before threading your needle, mark the spot for each button with a fabric-safe pen or chalk. This prevents buttons sliding out of alignment as you sew, resulting in a garment that looks tailored.
Align Buttonholes for Even Closures
Lay the garment flat and close the fabric as you want it to appear when worn. Mark through the existing buttonholes: this ensures every new button lines up with its intended spot.
- Line up the edge: Press both layers of fabric together, ensuring seams match up. This provides a solid guide for marking each button site exactly.
- Pin fabric in place: Use straight pins to hold fabric layers steady. This helps keep marks true and prevents shifting during the rest of the process.
- Check alignment: Open and close the garment. If marks seem off, adjust now—don’t wait until buttons are attached to fix mistakes.
- Draw light dots: Mark only so much as needed so you don’t stain the fabric. Dots should be visible but easy to cover with the button itself.
- Remove pins carefully: Keep fabric flat as you work so marks remain crisp and accurate for sewing.
When every mark matches a buttonhole, the finished result looks polished and professional. You’ll sip your coffee while fastening your shirt, admiring perfect alignment.
Spacing and Sizing for All-Button Types
Not all buttons are created equal. Large coat buttons need more space between each one, while blouse buttons can sit closer for seamless closure. Think of how you space picture frames—too close looks messy, too far apart leaves gaps.
- Measure spacing: Use a small ruler to set the gap for each button, usually 3–4 inches on shirts, wider for jackets. Spacing matters for consistent closure and appearance.
- Check fit with a button: Place a spare button over each dot to ensure it covers the mark and has room to move with the fabric. Adjust as needed before sewing.
- Account for fabric stretch: On stretchy or knit garments, space buttons slightly closer than on woven fabrics. This prevents gaping when worn and keeps everything in place.
- Use templates for repeat jobs: If you sew buttons for several shirts, make a simple cardboard template with evenly spaced holes as a guide for marks.
- Test with a pin: Before sewing, insert a pin where each button would go and close the garment. Adjust if anything looks crooked or tight.
This simple attention to placement raises the bar on DIY repairs. When asked, “Did you buy that shirt new?”, you can always smile and say, “No, I just know how to sew buttons right.”
Stitch Types That Lock in Strength and Prevent Loosening
The stitch you choose directly impacts how long a button stays attached. Consistent, snug stitches keep everything secure—no more pulling out that sewing kit every time a button wobbles.
Choose between the classic cross stitch for two-hole buttons, a box stitch for four-hole, and the shank method for thicker fabrics. Each approach serves a specific garment type and button style.
Cross-Stitch Method for Two-Hole Buttons
Thread your needle, tie a sturdy knot, and push from the backside of the fabric. Slip through one hole, pass down the other, and repeat in an X shape at least six times for a tight grip.
Wrap the thread under the button after sewing—creating a “thread shank.” This loop prevents the button from sitting too tightly, allowing fabric to move naturally when you fasten it.
Finish by knotting tightly beneath the fabric. Pull the knot close to the material to minimize visible thread ends and avoid future snagging or unraveling.
Box Stitch for Four-Hole Buttons
Sew straight across through the first pair of holes, then move diagonally to create a firm box pattern. Four to five passes in each direction hold the button securely in place.
Create a shank by winding the thread around the stitches under the button. This technique boosts durability on thicker or layered garments—think winter coats or blazers.
Use small, consistent stitches for support. Picture the thread forming a tiny raft under your button, letting it flex and hold strong through repeated use.
Reinforcement Tips That Add Years to Every Repair
Adding extra layers of strength not only prevents future repairs—it saves time and frustration down the line. One well-reinforced button can outlast the garment itself.
Minimize wear and thread breakage by doubling up thread, knotting securely, and always adding a thread shank when you sew buttons, especially on coats and bags.
Lock Knots to Finish Every Button
Secure stitching starts with a solid knot. After your last pass, slip the needle under the stitches behind the button, then loop the thread and pull it tight twice, trapping the knot below the surface.
- Double-knot at the end: This guarantees the thread won’t slide back through the fabric.
- Trim excess close: Leaving long tails looks messy and invites accidental snags, so always snip thread flush for a neat finish.
- Check stability: Tug the button gently; if it holds, you’ve done the job right.
- Practice on scrap fabric: Try different knots and note how they hold before sewing directly onto your garment.
- Mark the date discreetly: Use fabric marker to note repairs for future reference, reminding you to check areas prone to stress.
This careful finish protects your work and leaves a confident impression whenever someone inspects your repair job.
Thread Shank for Flexible Movement
Wrap the thread several times under the button after the main stitches are done. This creates a handy “neck” that gives your button room to flex as the garment moves.
- Lift the button slightly: Hold it up from the fabric with one hand as you wrap, preventing the shank from pulling too tight.
- Test movement: After wrapping, move the button side to side. If it swings freely but doesn’t droop, the shank is just right.
- Secure the final knot beneath the shank: Hide it under the button for a durable yet invisible finish.
- Reinforce on workwear: For uniforms and kids’ clothes, always use an extra-long shank to cope with heavy activity.
- Adapt for delicate clothes: Wind fewer times for thin fabrics so the button sits closer, enhancing the look and feel.
Give your repairs an upgrade by adding a shank step—even if you’ve skipped it before, you’ll feel a quality difference every time you sew buttons.
Everyday Fixes and Lifesavers at Home
You’ll save time and potential embarrassment by handling button mishaps as soon as they happen. Being prepared with the basics at home lets everyone enjoy clothes longer and skip last-minute sewing stress.
For example, when a favorite work shirt loses a button, pull out your repair kit and fix it before the next wear. This habit extends clothing life and maintains your tidy appearance everywhere you go.
Emergency Shirt Repair Before a Meeting
You notice a hanging button in the morning rush. Instead of tossing the shirt aside, pull it flat, mark the spot, and quickly sew buttons on using a double knot and thread shank.
Stitch fast and match the existing thread color. With practice, this mini-task takes under five minutes—enough to save the day and keep your confidence in check all day long.
Later, when someone compliments your look, you know it’s not just the shirt—it’s the effort you put into keeping everything in place.
Securing Heavy Coats for Changing Seasons
Winter gear can’t afford loose buttons. Reinforce every coat button at season’s start: use tough thread, lock knots, and thick shanks for a repair that lasts months, not weeks.
Check each button by yanking gently before storing coats away. Replace loose or stretched-out thread immediately, preventing heart-sinking moments on cold days when closure fails.
Turn this routine into a seasonal habit. Each fall, line up coats and do a round of button checks—you’ll breeze through chilly days, knowing every button is solidly in place.
Consistent Practice Makes Button Sewing Second Nature
Each time you sew buttons using these methods, your confidence and speed grow. Don’t reserve button sewing just for emergencies; treat it as a valuable, lifelong skill that keeps your wardrobe fresh and neat.
Try setting aside an hour each month to check shirts, pants, and jackets. When you spot a loose button early, you can fix it in minutes—no more letting minor repairs pile up.
Developing Quick Button-Check Routines
Make it a habit to scan hems, plackets, and cuffs as you fold or sort laundry. When something feels loose, mark the spot and keep a small repair kit nearby for fast fixes after each wash.
Recruit family members. Teach kids or partners the basics—thread, knot, and sew—and they’ll gain confidence and independence. These moments create practical skills as well as cherished memories together.
Place a notecard with reminders in your sewing box: “Check buttonholes, double-knot, add shanks.” Keeping steps visible shortcuts learning and keeps your repairs top-notch every time.
Trying Patterned Buttons and Decorative Threads
Sewing buttons isn’t just about repairs—it’s a chance to personalize clothes. Use bright thread for a playful touch or swap boring plastic buttons for vintage, wooden, or metal types for extra flair.
Mix and match button styles on a plain bag, or coordinate colorful buttons on a child’s jacket. Make a point to share the process out loud: “Let’s pick a new button for your favorite sweater.”
Celebrate each finished repair as its own project. Take a quick photo after you sew buttons with a creative twist to track your improvements and share ideas with friends who appreciate crafty results.
Securing Your Wardrobe: Confidence in Every Button
Using the right supplies, accurate placement, strong stitches, and simple reinforcement techniques makes all the difference when you sew buttons for lasting hold and style.
Every well-sewn button adds comfort and confidence to daily routines. Precision today means fewer wardrobe malfunctions tomorrow—and a proactive sense of pride in your skills.
Adopt these practical habits to ensure no button lets you down. Every shirt, coat, or bag gains new life, giving you a wardrobe that stands up to everything you put it through.
Frequently Asked Questions
What type of thread is best when I sew buttons on thick fabric? For thick fabrics like denim or coats, strong polyester thread is ideal. It resists fraying and holds up against heavy use, providing a durable bond that won’t snap or loosen easily after repeated washes or pulls.
How can I stop buttons from twisting or coming loose after a few wears? To prevent twisting, add a thread shank beneath the button and tighten the knot directly under the fabric. Consistent, even stitches distribute strain, keeping buttons flat and secure even on stretchy or activewear fabrics.
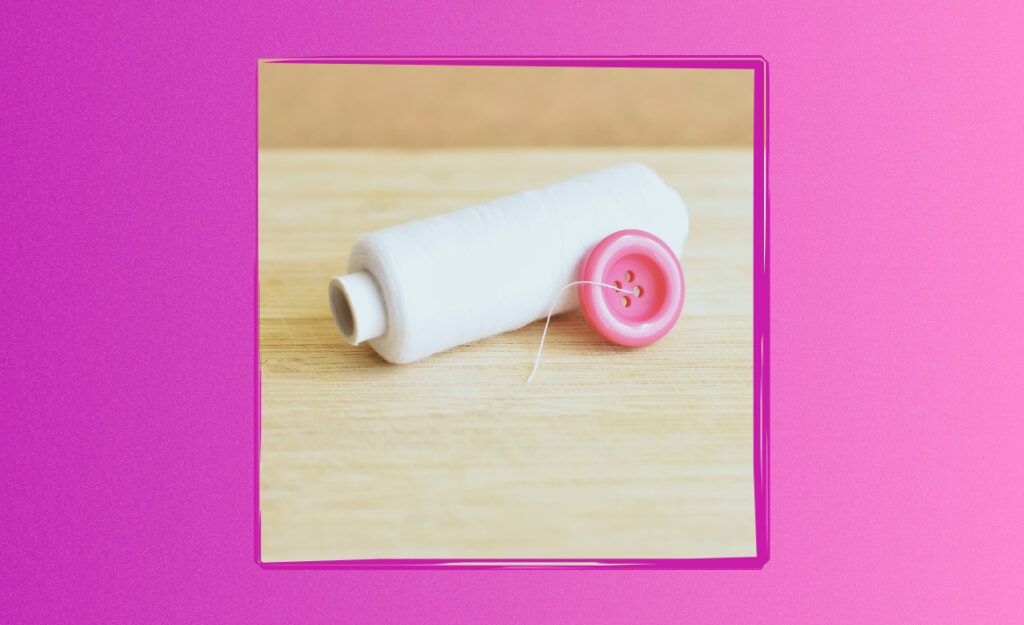
What’s the fastest way to match new buttons to existing ones? Carry a spare sample to the store or compare closely under bright light at home. Check the number of holes, diameter, and color tone as well as thickness to ensure a seamless look on repaired garments.
Is there a simple way to teach kids to sew buttons securely? Yes! Demonstrate on a scrap of cloth, focusing on threading the needle, pulling tight knots, and making neat, small stitches. Use larger buttons to start, moving to smaller ones as confidence grows. Practice together for shared learning.
How do I remove old thread from the button area without damaging fabric? Use sharp, pointed scissors or a seam ripper to gently cut away old thread. Work from the button’s edge and move slowly, lifting small segments so threading your new button doesn’t tear or weaken the surrounding material.