Towering bookcases, ceiling fans, and tight corners tend to collect grime—just out of easy reach. That nagging layer of dust stares down, begging for a clever approach. If you enjoy a spotless home but struggle with these dusty challenges, you’ll appreciate tried-and-tested dusting hacks that transform cleaning into something almost satisfying.
Addressing tricky spaces isn’t simply about having the right equipment. It requires knowing a few creative angles: how to bend, extend, and repurpose tools for smarter cleaning. By understanding these hacks and techniques, anyone can conquer dust in every corner—without acrobatics or frustration.
This article dives deep into practical dusting hacks, spotlighting realistic techniques anyone can adopt. We’ll walk you through innovative tips, hands-on examples, and quick decision tools to tackle your messiest, most unreachable spots with ease. Ready for a dust-free home? Let’s dig in!

Remove Carpet Stains Fast Without Chemicals
Discover how to use baking soda, vinegar, and club soda for spotless, healthy carpets that look brand new.Quick Extension Tricks That Save Your Back
You’ll eliminate frustration with extension hacks that reach the highest shelves or deepest gaps. By applying these tricks, you’ll avoid dangerous climbing and make regular dusting genuinely safe.
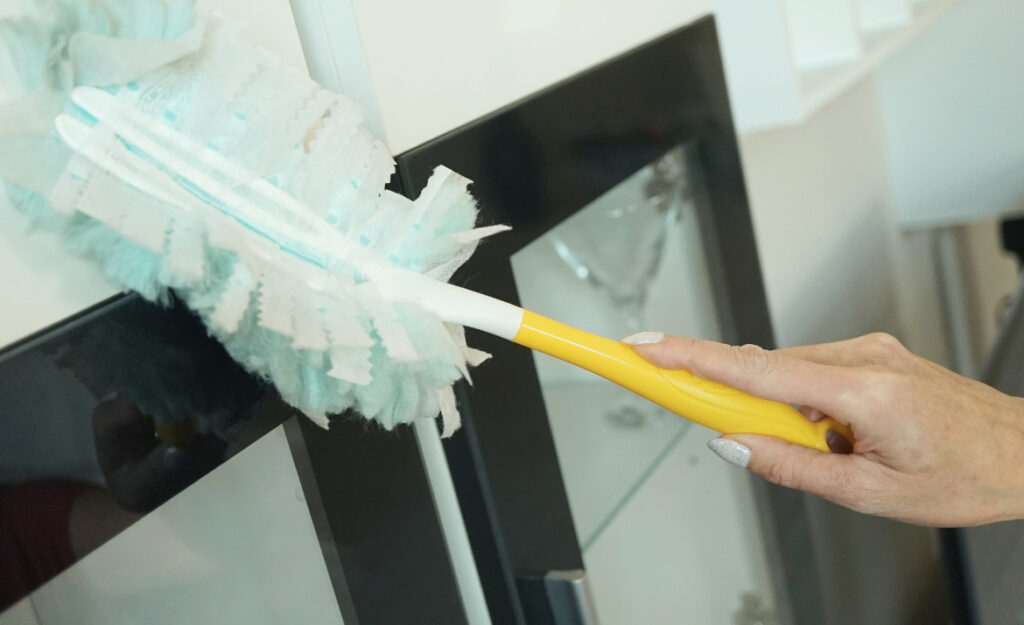
Keep a lightweight telescopic duster handy for ceiling fans and tall bookshelves. Extend the pole, secure your grip, and guide it gently so dust falls onto a towel below. Most users say, “Done! And I didn’t even need a stepstool.”
Repurpose Everyday Tools for Fast Reach
Using everyday objects gives you dusting hacks without entering an aisle of cleaning gadgets. Wrap a microfiber cloth around a ruler, secure with a rubber band, and slip it behind appliances—thin enough for tight gaps and durable enough to capture lint.
If a wooden spoon is closer than a duster, grab it. Cover the head with a reusable cloth and angle it underneath the fridge or behind the headboard. Improvise with the tools in your kitchen or craft drawer.
For high-traffic corners, ask a friend to hold a flashlight while you dust. Shadows disappear and you’ll see every stray particle, making those speedy sweeps far more effective.
Mind the Angle: Safe Approaches
If you need to reach over a staircase rail, stand with your feet hip-width apart, knees slightly bent. Rest your forearm against the rail for steady balance before stretching the duster. Small stance changes keep your back safer during awkward angles.
Don’t twist at the waist; instead, nudge a lightweight ottoman for height or support, if needed. Always pause if you feel a strain—use extension tools, not risky positions. Dusting hacks work best with smart ergonomics.
For ceiling molding or tall ledges, avoid ladders unless attached wall brackets are present. A sturdy, extendable pole lets you reach safely from the ground, using slow, steady sweeps to keep dust controlled.
| Tool | Best For | Setup Time | Hack Takeaway |
|---|---|---|---|
| Telescopic Duster | Ceiling fans, high shelves | Under 1 min | Keep one collapsed in a closet; fast to grab for unexpected guests. |
| Microfiber Cloth & Ruler | Between fridge, washer, appliances | 30 sec | Wrap, secure, and slide into place for the thinnest dirt zones. |
| Flexible Vacuum Wand | Behind heavy furniture | 1 min | Attach, angle, and sweep—captures fine dust where brooms miss. |
| Old T-shirts & Broom Handle | Behind beds, under dressers | 1 min | Stretch a shirt, tie with string, and swipe for broad reach. |
| Paintbrush | Small electronics, window sills | Instant | Keep one in your cleaning kit for a portable detailed sweep. |
Airflow Strategies for Dust-Free Vents and Grates
Improve your air quality and performance of vents by prioritizing smart, safe cleaning around grates, registers, and radiators. Using dusting hacks here ensures more effective HVAC function and prevents allergy flare-ups.
Start with a vacuum set to low or medium, fitting a brush attachment directly over the vent’s openings. Slide the crevice tool gently along each slat to avoid shifting the grille. Say aloud, “That softened brush works even better than canned air.”
Dust-Blocking Steps for Clean Air
Before running the heat or air conditioning, remove floor or wall vent covers. Soak covers in mild soapy water, then scrub gently with a soft-bristled brush. Dry completely before reinstalling to prevent rust and mold.
- Brush vent covers with a soft toothbrush for precise, quick removal of caked-on dust. This works well for plastic and painted metal, as bristles reach awkward grooves.
- Vacuum both before and after wiping: first to remove large dust buildup, then to collect fine debris and lint after. It keeps dust from floating back into the air.
- Apply a light coat of furniture polish or dust-repellent spray before replacing covers. The slicker surface prevents dust from building up again too soon.
- Bend pipe cleaners for tricky nooks around radiators or ornate registers. They snake through the smallest slots and snag lint far more efficiently than cotton swabs.
- Limit vent cleaning to once a month unless you see visible buildup or have allergies. Frequent over-cleaning can sometimes damage paint or the vent finish.
After finishing, breathe deeply to notice fresher air and more comfortable airflow. Repeat every 4–6 weeks for best results.
Electronics and Grate Details
Keep a new paintbrush in your kit for detailed work on speaker grilles, computer vents, and similar grates. Sweep with short, flicking motions to push dust outward, not deeper inside the device.
- Handle speakers by their frame and avoid pressing on speaker cones when dusting. One gentle swipe is safer than repeated pokes. Finish with a dry microfiber cloth.
- Clean vented computer cases by powering down the equipment, unplugging, and brushing perpendicular to the slats. Minimize static with quick downward strokes, not rubbing or circular motions.
- Use a can of compressed air for quick bursts across recessed power supply vents. Hold the can upright, so moisture doesn’t spray into sensitive electronics—one or two passes works best.
- Never force a cloth inside tightly packed grates—tug gently and stop if resistance is felt, to avoid warping or damaging fins.
- Schedule deep cleaning every three months, or any time performance drops. Routine care is easier than waiting for blockages or overheating.
Your electronics will not only look better but remain cooler and safer. Finish each session feeling accomplished: “That was easier than I expected—and now my laptop is dust-free.”
Tight Corners and Baseboards: Smart Approaches
If you’ve ignored floor-level dust because it seems tedious, you’re not alone. By learning a few new dusting hacks, clearing baseboards and corners becomes less of an afterthought.
Swiping a sock-covered hand along baseboards avoids knuckle scrapes. Run a dryer sheet along each edge after dusting: not only to wipe away new particles, but to add an anti-static coating.
Pet Hair and Confetti Cleanups
If you’re a pet owner, rolling a lint brush directly over carpet edges and corners works wonders. Watch the sticky pad lift fur, crumbs, and even glitter leftover from crafts or parties.
For heavier buildup, wrap duct tape—sticky side out—around your fingers. Quickly dab along edges and behind doors, using fresh tape for each section. Toss when full and move to the next zone.
Check between baseboard and carpet seams with a flashlight. Use a credit card wrapped in a cloth for thin crevices, sliding slowly so nothing grinds deeper into the fibers. Say aloud: “Gotcha!” when mysterious fuzz appears.
Appliance Cubbies and Under-Furniture Zones
Move shoes and baskets first from beneath benches, couches, or shallow cabinets. Take a long-handled duster or vacuum wand and sweep slowly, keeping your body parallel to the floor for full coverage.
For especially deep cubbies, attach a clean sock or microfiber towel to the end of a yardstick with rubber bands. Slide gently under furniture, then shake outside before repeating for each room.
Finish each deep corner with a spritz of mild cleaning spray and a soft cloth. Your baseboards will look instantly brighter, and corners less haunted by “dust bunnies.”
Safe Fan Blade Cleaning Without the Mess
Clean ceiling fan blades quickly and safely with this technique: slide an old pillowcase over the blade, pinch closed at the base, and drag outwards. Dust stays inside, not sprinkled over beds or floors.
Repeat for each blade, flipping the case inside out as it fills. Shake dust directly into the trash or outside before washing the pillowcase for next time’s use.
Make Fans Shine Year-Round
Once dust is gone, wipe each blade with a barely damp microfiber cloth and a drop of mild soap. Dry immediately with a fresh cloth to keep metal and wood lustrous.
For high ceilings, attach your pillowcase to an extension pole, boosting your reach without dragging out a ladder. Control the pillowcase’s tension for a snug fit against the blade.
If pollen or sticky messes are present, use diluted vinegar on a cloth. Finish by running your hand along the blade’s edge—smooth and dust-free is your cue to finish.
Address Fan Housings and Light Kits
Turn off power to the fan before dusting housings or light globes. Remove glass covers, if possible, and wash in warm soapy water. Replace after they’re fully dry.
Brush housings and pull-chains with a soft paintbrush, focusing on nooks where dust loves to cling. Short, quick flicks will dislodge most lint on the first try.
Inspect mounting brackets and screws for dust accumulation. Use a cotton swab or soft toothbrush for intricate details. Each swipe keeps your ceiling fan efficient and grime-free.
Window Frames, Blinds, and Screens Done Right
Freshen indoor air and brighten rooms by dusting every layer of your windows. With the right dusting hacks, sunlight and views reappear like brand new.
Vacuum window sills with a soft-bristled brush, working from one side to the other in small sections. If screens are removable, take them outside, tap gently, and sweep with a dry brush for thorough removal.
Mini-Blinds: Step and Sequence
Close the blinds, then wipe a microfiber glove or old sock down each row. Turn the slats the opposite direction, repeating step-by-step for even coverage. People exclaim, “So much dust disappears, and I barely had to scrunch my fingers.”
If grime is stubborn, dip your cloth in water mixed with a bit of dish soap. Wipe again, then finish with a dry pass to prevent streaks and water spots.
Check for missed spots from the outside looking in. High sunlight reveals streaks or dust lines so you can tidy until the blinds look crisp and sharp.
Storm Window Mullions
Detach storm windows if possible and soak mullion frames in warm, sudsy water. Scrub gently with a toothbrush, especially at corners. Air-dry before reinstallation.
For non-removable frames, wrap a cloth around a thin spatula, then twist along each mullion and window channel. This knack snags buildup that’s left behind by wider cloths.
Spritz windows once finished with glass cleaner and squeegee dry. Every light ray will feel clearer and the view outside will appear sharper after these steps.
Acceptable Shortcuts When Time is Tight
When you’re in a rush, these dusting hacks bring visible results fast—perfect before guests arrive. Don’t try to deep clean, just pick the most obvious surfaces to brighten your space.
Quick-clean the tops of furniture, TV stands, and entryway shelves with a damp cloth and a couple of swipes. For extra polish, use a slightly scented cleaning spray as a final touch.
Checklist: Fast Dusting Wins
- Target only what guests will see—focus on eye-level and main traffic areas with a quick, sweeping dust pass.
- Swap out dirty microfiber cloths midway to avoid streaks or redistributing grime as you go.
- Use mini lint rollers on lamp shades and throw pillows for instant improvement in appearance.
- Hang a clean, decorative towel over kitchen appliances for a “finished” look, distracting from deeper dust.
- Check tables for fingerprints or crumbs last—wipe in straight lines for a crisper, quicker finish on glass or lacquered surfaces.
You’ll see immediate freshness and can return for detail dusting when life slows down. Even five minutes brings a noticeable upgrade when you use shortcuts strategically.
Keep Dust Out: Maintenance Tips for Lasting Results
Proactive routines prevent most dust from settling, setting you up for an easier clean next week. Consistency is better than long, exhausting bursts of work.
Taking a few key steps daily cuts down on future cleaning. For example, vacuuming high-traffic areas and wiping tables once each evening prevents dust from building into layers that require deep cleaning later.
Stop Dust at the Door
Place doormats at each entrance, inside and out, to catch dirt before it enters. Shake mats outside regularly, and vacuum them weekly so grit isn’t ground into entryway floors.
Ask family and guests to remove shoes at the door. Try: “Would you mind slipping your shoes off? It keeps the house cleaner and cuts down on dust.”
Store a broom and dustpan by the door. Give quick sweeps after grocery runs or yard work—five seconds saves thirty minutes in the long run.
Humidity Control for Less Dust
Keep home humidity between 40% and 50% year-round using a small humidifier or dehumidifier as needed. Dust is less likely to hover in the air or re-settle when rooms aren’t overly dry.
Wipe houseplants with a damp cloth each week to catch dust and keep leaves shining. Watch for fine powder—especially on ledges above radiators or window sills.
Install HEPA filters in your HVAC system and change them every three months. Clear airflow reduces recirculated dust noticeably. People notice: “It smells fresher in here!”
Fresh, Tidy Spaces: Making Dusting Work for You
Today’s dusting hacks put even stubborn, hard-to-reach spaces within easy control. By extending your reach, tackling vents, and using smart shortcuts, even the trickiest corners shine again.
With gentle routines, effective tools, and preventative habits, dust becomes an occasional chore—not a constant headache. Each trick keeps your space cleaner and more inviting for family and friends.
Try out new routines and adapt your favorite dusting hacks for your own home. In a week, you’ll notice how much lighter and healthier your rooms feel. Make dust control a simple, satisfying part of your care routine!
Frequently Asked Questions
How do I keep dust from settling quickly after cleaning?
To slow dust buildup, use an anti-static spray or finish with a dryer sheet on surfaces. Minimize clutter, change HVAC filters regularly, and keep windows closed on windy days. Let freshly cleaned surfaces dry fully before replacing objects.
What is the best way to clean behind heavy furniture I can’t move?
Secure a microfiber cloth to a long flexible handle or clean yardstick, then sweep it under and alongside the furniture edge. Vacuum attachments with slim, flexible wands also help. Tackle these areas every two to three months for best results.
Are DIY dusting tools as effective as store-bought tools?
DIY tools—like a sock on a stick or ruler wrapped in cloth—grab a surprising amount of dust, especially for narrow spaces. Commercial dusters can save time and effort, but homemade solutions work great for those tricky or overlooked spots.
Can I use vacuum cleaners for all dusting tasks?
Vacuum attachments work well on floors, upholstery, and vent covers but not on delicate or small objects. Combine vacuuming with gentle wiping using microfiber cloths for electronics or tight corners, where powerful suction isn’t safe or convenient.
Is it necessary to dust every week?
The frequency depends on your lifestyle and environment. Weekly dusting works for homes with kids, pets, or allergy concerns. Less-trafficked rooms may only need attention every two to four weeks, while high-use areas benefit from brief daily maintenance.


