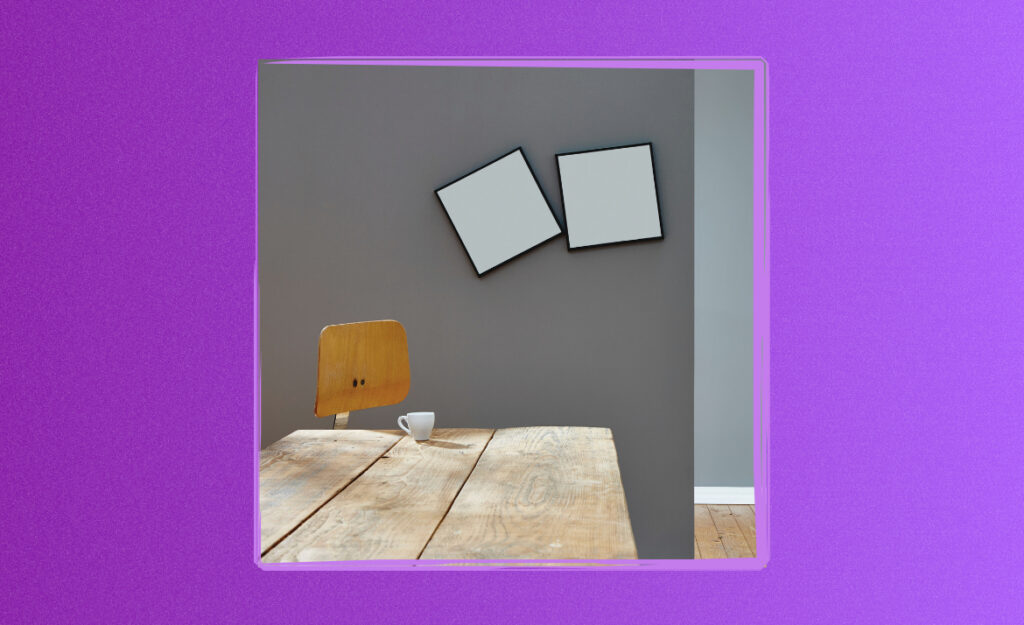

Picture walking into a room where every frame sits perfectly level. There’s a sense of order, yet achieving that look with wall frames seems tricky—until you discover how easy it is to straighten wall frames with the right know-how.
Neatly aligned wall art signals care and attention. Whether arranging family photos or a poster collection, crooked frames stand out. Straightening wall frames improves visual harmony and shows your eye for detail in home decor.
You don’t need a toolbox or advanced skills for this. Throughout this guide, you’ll explore straightforward, effective ways to straighten wall frames, learning methods anyone can apply in just seconds.
Set a Solid Foundation: Ensuring Your Walls Are Ready
Accurate results begin with assessing your wall. You’ll notice frame alignment improves dramatically when you confirm walls are clean and nails or hooks are securely installed before placing any decor.
Frames naturally shift over time. For lasting straightness, inspect your wall for warped spots or loose hardware, and fix these issues before hanging a single picture. Think of this step as preparing a canvas before painting.
Wall Prep: What Homeowners Say Really Matters
Lindsay, a homeowner, says, “I always dust the spot first—frames grip better.” Using a microfiber cloth removes grease and dust, ensuring adhesive strips or hooks bond properly and the frame doesn’t slowly sag.
Clear, dry walls prevent shifting too. Tom recalls, “I had to repaint a patch. Any bumps make frames wobble, so I fill holes and sand.” This tip shows investing time up front pays off with balanced displays.
Just like prepping a recipe’s ingredients, taking five minutes to prep your wall removes headaches. Choose a reliable anchor—think picture hook, wall screw, or sturdy adhesive pad—for each frame based on size and weight.
Choosing the Right Hardware for Stability
Nails bend under heavier frames, so metal hooks with two prongs hold better. Watch realignment after bumps—spring-loaded frame hangers help frames self-center if nudged accidentally by a door or vacuum.
Samantha found using wall anchors means her gallery wall remains crisp, “especially in kids’ rooms where things get jostled.” For concrete or brick, masonry hooks or special wall plugs prevent slippage better than standard nails.
If you change frame locations, use patching compound to fill old nail holes and sand flat. A smooth surface makes repositioning simple and keeps walls looking fresh.
| Hook Type | Best For | Weight Limit | Action Step |
|---|---|---|---|
| Standard Nail | Light frames | Up to 5 lbs | Use for temporary or seasonal art |
| Picture Hook | Medium prints | Up to 20 lbs | Choose for everyday hanging |
| Wall Anchor | Heavy pieces | Up to 50 lbs | Essential for stability on drywall |
| Adhesive Strip | Small frames | Up to 4 lbs | Works best for renters or tiled walls |
| Masonry Hook | Brick/Concrete | 10–40 lbs | Pick when decorating brick fireplaces |
Fast Alignment: Practical Routines for Straight Frames
Consistent routines make all the difference in keeping straight wall frames throughout your home. Frame adjustment takes only seconds when you set habits that support accuracy and attention to detail during installation and maintenance.
Think about the time people spend fixing crooked artwork. A planned routine—including quick checks with simple tools—ensures a uniform look and lets you catch imbalances before they become distracting.
Simple Daily Check: Stay Proactive
Once frames are up, add a quick visual scan to your daily tidy-up. If a frame looks off, gently nudge it back into alignment with both hands.
- Stand back five feet and check for tilt—this replicates how guests view your wall. Adjust any frame that looks off.
- Keep a small level or phone level app handy in drawers to double-check more stubborn frames.
- Set frames against an easily identified horizontal line, such as the top of a doorway for consistent height.
- Straighten wall frames that rotate out after cleaning or door slams immediately to avoid repeated misalignment.
- Remove dust from frame edges during your routine so weight doesn’t shift and cause further tilt later.
A couple of minutes spent scanning frames saves frustration and ensures a meticulously cared-for look every day. Habit creates long-term straightness.
Monthly Deep-Check: Secure Each Piece
Once a month, pick up on small slants by comparing each frame’s lower edge to trim or eye-level elements in the room, using your level tool if needed.
- Double-check that hooks remain tight and haven’t slipped down in drywall; retighten or reinforce them as needed.
- For frames with wire hangers, ensure wires have not stretched or come loose; adjust tension or retie for snug support.
- Inspect for cracked glass or warped backing that could push the frame off-level and replace if needed.
- If you use adhesive strips, gently test their grip; replace worn-out strips promptly to keep frames flush with the wall.
- Straighten wall frames that resist realignment by addressing root causes, like sloped ceilings or warped floors, with furniture pads as shims.
Monthly deep-checks catch early signs of drift or slippage, keeping everything in peak shape and protecting your investment in decorative displays.
Quick-Fix Techniques for Frames Already Hung
It’s common to notice a frame out of place after cleaning or moving furniture. Swift corrections become second nature using these practical approaches, giving you polished results without the need to remove and rehang each frame.
Frame Leveling on the Spot
If a frame looks askew right after someone brushes past, place both thumbs at each lower corner and press gently upward until the top edge aligns. This resets the center of gravity.
An easy analogy here: think of twisting a loose lid back into position—the same gentle, even pressure applied at two points brings balance. Copy this phrase: “Check both lower corners, straighten upward.”
Where frames repeatedly twist, add a small felt or rubber bumper behind the lower corners to help anchor them.
Counteracting Persistent Tilting
Sometimes, a frame swings out of level due to an unbalanced hook or wire. Slip a folded piece of paper or thin cardboard between the frame’s corner and the wall to fight gravity’s pull.
This subtle fix is invisible but effective. Homeowners like Carla remark: “A folded notecard keeps my large frame stable all month.”
You could also use a dab of removable poster putty at the edges. Press gently so the putty sticks but leaves no mark for future adjustment.
Visual Reference Points: Key to Uniformity Across Walls
The secret to room-wide polish is grid-like consistency in your frame arrangement. Reference points—like window sills and moldings—make it easy to keep straight wall frames no matter how many you display together or individually.
Row and Column Tricks for Groups
Start a gallery by choosing a visual baseline, such as the midpoint of a sofa back or the line where window trim runs. Hang the first frame at this level to anchor the arrangement.
Lay painter’s tape in a straight line across the wall to match the baseline. Align every frame’s bottom edge to the tape before nailing anything. Pull off the tape after hanging.
Match spacing side-to-side by using an index card or ruler—for example, space each frame two inches apart to create harmony.
Maintaining Alignment When Walls Are Imperfect
Not all walls are square. When floors slope slightly or molding isn’t level, frames aligned visually, not by measurement, look best. Trust your eye from a standard viewing height—about five feet from the floor.
Adjust frame height up or down a fraction of an inch as needed to follow a perfectly straight line across misaligned drywall.
Straighten wall frames in a cluster by comparing each to a central anchor point, like an oversized main print—it draws the eye and makes minor mismatches less obvious.
Troubleshooting: Spotting and Fixing Annoying Frame Shifts
Occasional disturbances—a slammed door, thumping music, or children’s games—shift frames. Once you recognize the causes, quick interventions restore order, preventing future tilts with the right fixes.
When Frames Consistently Drift
If every few days the same frame sags, upgrade the hook to a two-pronged style or stick a non-slip pad beneath the corners. This small change delivers big reliability.
If you sense vibration from heavy footsteps or nearby traffic, use heavier hardware or install frames with double fasteners.
Frames slipping repeatedly from nail heads might indicate the wall’s too soft or the hook’s insufficient. Shift to wall anchors or thicker hooks for security.
Fixes for Wall Frame Hang-ups
Sometimes a nail may loosen over time in drywall. Pull it, patch the hole, and move your frame up a few inches, then repound the nail or use a stronger picture hook so it stays put.
Glass-front frames sometimes gain weight at the bottom from dust or humidity. Clean and dry both the frame and backing to ensure a perfect fit and keep things level.
Straighten wall frames post-maintenance by realigning every piece with your preferred baseline, keeping your display fresh and polished.
Working with Unusual Frames: Solutions for Irregular or Oversized Art
Asymmetrical or extra-large pieces require additional support to stay level. Following a few rules for these specialty pieces ensures your signature artwork always enhances rather than distracts from your walls.
Securing Heavy Frames for the Long Term
Use D-ring hangers installed at identical heights on both sides for frames over 24″ wide. Attach a wall anchor for each D-ring. This redundant support prevents frames from ever bowing or slipping sideways.
Frames longer than 36″ sometimes demand three anchors spaced evenly for ultimate stability, especially in high-value spaces like hallways or living areas with heavy traffic.
Don’t tug directly on the frame; adjust by lifting at the D-ring itself for precise corrections that avoid stress on glass or joinery.
Managing Non-Traditional Shapes and Textures
Odd-shaped items, like decorative trays or antique tools, benefit from museum putty or ultra-thin Velcro strips to hold bottom edges in place.
If the item is valuable or irreplaceable, consult a professional for proper mounting. Otherwise, test stability by lightly tapping the wall—watch for shifting and adjust hangers accordingly.
Irregular frames set flush to the wall with stabilizing pads at each corner minimize distracting movement and keep displays attractive year-round.
Confidence in Every Straightened Frame: Key Takeaways
Quick fixes, reference points, hardware tweaks, and regular checks each serve a role in the quest to effortlessly straighten wall frames. Adopt these actionable routines for polished walls, whether you’re displaying a gallery or a single print.
The sense of order in a room directly reflects the care with which you treat your wall decor. Frame alignment impacts how guests perceive your space, offering instant proof of your attention to detail and pride in your home.
Each time you use these tips, enjoy the satisfaction of leveled, stylish walls. Let every frame you hang express your personal standard for neatness and visual appeal—lasting success comes from small, consistent habits.
Frequently Asked Questions
What causes wall frames to go crooked even after straightening?
Wall vibrations, shifting wall hooks, or subtle changes in humidity may cause frames to tilt again. To reduce slippage, use two-pronged hooks or low-profile adhesive pads, and maintain attention to leveling.
Can I straighten wall frames without any tools?
Absolutely. Most minor tilts can be fixed by hand—gently push at corners to realign. For a more durable result, keep adhesive bumpers or removable putty on hand for quick, tool-free stability.
Do heavy frames need special hardware to stay straight?
Yes. Heavy or oversized frames require wall anchors or D-rings on both sides for balance. Ensure hardware is placed in wall studs when possible to prevent future shifting or falls.
Will sticky strips damage my walls or frames?
Removable adhesive strips, such as those rated specifically for picture hanging, prevent damage when used according to instructions. Test on a small section of wall to ensure compatibility before full installation.
How can I maintain a straight wall frame display over time?
Add visual checks to your cleaning routine, inspect and reinforce hardware monthly, and use bumpers or pads where needed. These practices keep walls looking sharp year-round, with minimal maintenance.